
This guide is also available to star/follow on our GitHub repository.
Gemini CLI is an open-source AI assistant that brings the power of Google’s Gemini model directly into your terminal. It functions as a conversational, “agentic” command-line tool - meaning it can reason about your requests, choose tools (like running shell commands or editing files), and execute multi-step plans to help with your development workflow.
In practical terms, Gemini CLI acts like a supercharged pair programmer and command-line assistant. It excels at coding tasks, debugging, content generation, and even system automation, all through natural language prompts. Before diving into pro tips, let’s quickly recap how to set up Gemini CLI and get it running.
Getting Started
Installation: You can install Gemini CLI via npm. For a global install, use:
npm install -g @google/gemini-cliOr run it without installing using npx:
npx @google/gemini-cliGemini CLI is available on all major platforms (it’s built with Node.js/TypeScript). Once installed, simply run the gemini command in your terminal to launch the interactive CLI.
Authentication: On first use, you’ll need to authenticate with the Gemini service. You have two options: (1) Google Account Login (free tier) - this lets you use Gemini 2.5 Pro for free with generous usage limits (about 60 requests/minute and 1,000 requests per day. On launch, Gemini CLI will prompt you to sign in with a Google account (no billing required. (2) API Key (paid or higher-tier access) - you can get an API key from Google AI Studio and set the environment variable GEMINI_API_KEY to use it.
API key usage can offer higher quotas and enterprise data‑use protections; prompts aren’t used for training on paid/billed usage, though logs may be retained for safety.
For example, add to your shell profile:
export GEMINI_API_KEY=”YOUR_KEY_HERE”Basic Usage: To start an interactive session, just run gemini with no arguments. You’ll get a gemini> prompt where you can type requests or commands. For instance:
$ geminigemini> Create a React recipe management app using SQLiteYou can then watch as Gemini CLI creates files, installs dependencies, runs tests, etc., to fulfill your request. If you prefer a one-shot invocation (non-interactive), use the -p flag with a prompt, for example:
gemini -p "Summarize the main points of the attached file. @./report.txt"This will output a single response and exit. You can also pipe input into Gemini CLI: for example, echo “Count to 10” | gemini will feed the prompt via stdin.
CLI Interface: Gemini CLI provides a rich REPL-like interface. It supports slash commands (special commands prefixed with / for controlling the session, tools, and settings) and bang commands (prefixed with ! to execute shell commands directly). We’ll cover many of these in the pro tips below. By default, Gemini CLI operates in a safe mode where any action that modifies your system (writing files, running shell commands, etc.) will ask for confirmation. When a tool action is proposed, you’ll see a diff or command and be prompted (Y/n) to approve or reject it. This ensures the AI doesn’t make unwanted changes without your consent.
With the basics out of the way, let’s explore a series of pro tips and hidden features to help you get the most out of Gemini CLI. Each tip is presented with a simple example first, followed by deeper details and nuances. These tips incorporate advice and insights from the tool’s creators (e.g. Taylor Mullen) and the Google Developer Relations team, as well as the broader community, to serve as a canonical guide for power users of Gemini CLI.
Tip 1: Use GEMINI.md for Persistent Context
Quick use-case: Stop repeating yourself in prompts. Provide project-specific context or instructions by creating a GEMINI.md file, so the AI always has important background knowledge without being told every time.
When working on a project, you often have certain overarching details - e.g. coding style guidelines, project architecture, or important facts - that you want the AI to keep in mind. Gemini CLI allows you to encode these in one or more GEMINI.md files. Simply create a .gemini folder (if not already present) in your project, and add a Markdown file named GEMINI.md with whatever notes or instructions you want the AI to persist. For example:
# Project Phoenix - AI Assistant- All Python code must follow PEP 8 style. - Use 4 spaces for indentation. - The user is building a data pipeline; prefer functional programming paradigms.Place this file in your project root (or in subdirectories for more granular context). Now, whenever you run gemini in that project, it will automatically load these instructions into context. This means the model will always be primed with them, avoiding the need to prepend the same guidance to every prompt.
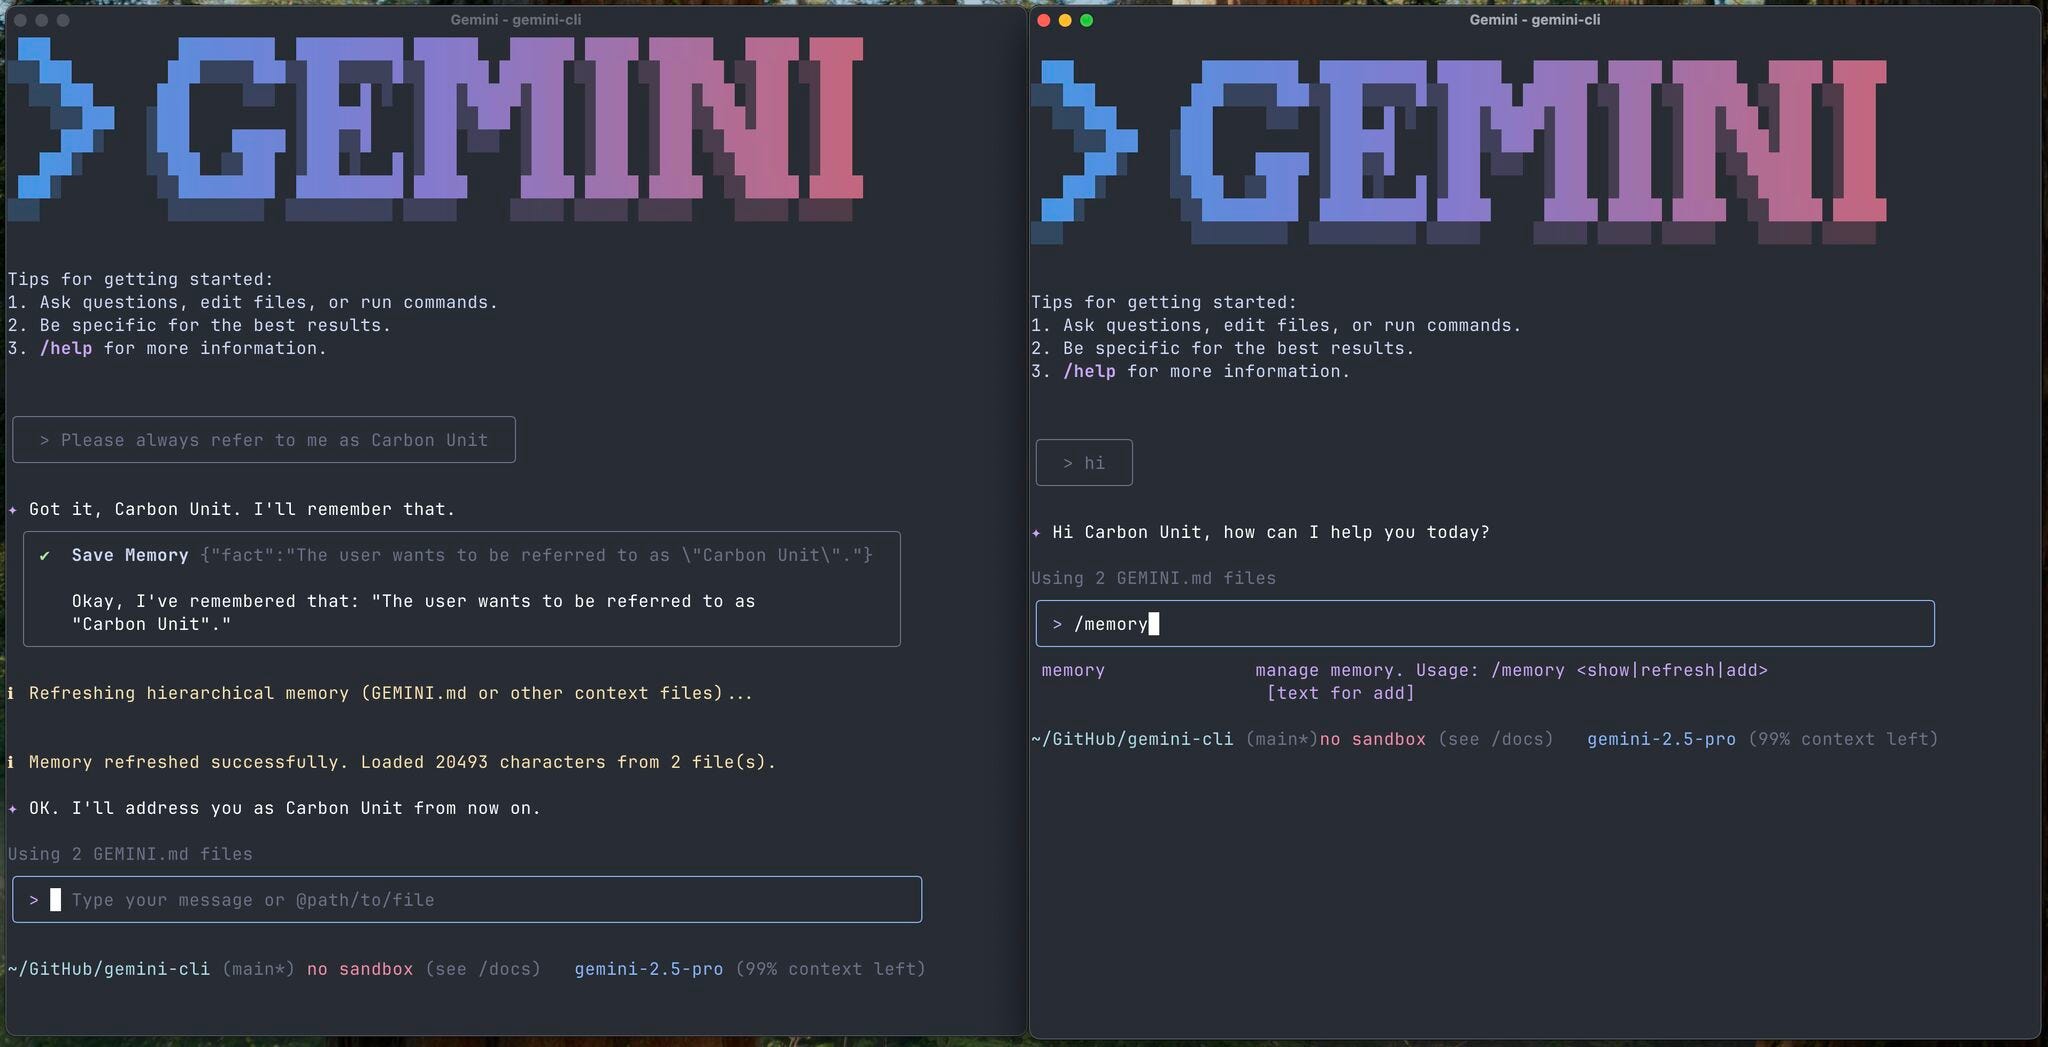
How it works: Gemini CLI uses a hierarchical context loading system. It will combine global context (from ~/.gemini/GEMINI.md, which you can use for cross-project defaults) with your project-specific GEMINI.md, and even context files in subfolders. More specific files override more general ones. You can inspect what context was loaded at any time by using the command:
/memory showThis will display the full combined context the AI sees. If you make changes to your GEMINI.md, use /memory refresh to reload the context without restarting the session.
Pro Tip: Use the /init slash command to quickly generate a starter GEMINI.md. Running /init in a new project creates a template context file with information like the tech stack detected, a summary of the project, etc.. You can then edit and expand that file. For large projects, consider breaking the context into multiple files and importing them into GEMINI.md with @include syntax. For example, your main GEMINI.md could have lines like @./docs/prompt-guidelines.md to pull in additional context files. This keeps your instructions organized.
With a well-crafted GEMINI.md, you essentially give Gemini CLI a “memory” of the project’s requirements and conventions. This persistent context leads to more relevant responses and less back-and-forth prompt engineering.
Tip 2: Create Custom Slash Commands
Quick use-case: Speed up repetitive tasks by defining your own slash commands. For example, you could make a command /test:gen that generates unit tests from a description, or /db:reset that drops and recreates a test database. This extends Gemini CLI’s functionality with one-liners tailored to your workflow.
Gemini CLI supports custom slash commands that you can define in simple configuration files.
Under the hood, these are essentially pre-defined prompt templates. To create one, make a directory commands/ under either ~/.gemini/ for global commands or in your project’s .gemini/ folder for project-specific commands. Inside commands/, create a TOML file for each new command. The file name format determines the command name: e.g. a file test/gen.toml defines a command /test:gen.
Let’s walk through an example. Say you want a command to generate a unit test from a requirement description. You could create ~/.gemini/commands/test/gen.toml with the following content:
# Invoked as: /test:gen "Description of the test" description \= "Generates a unit test based on a requirement." prompt \= """ You are an expert test engineer. Based on the following requirement, please write a comprehensive unit test using the Jest framework.Requirement: {{args}} """Now, after reloading or restarting Gemini CLI, you can simply type:
/test:gen "Ensure the login button redirects to the dashboard upon success"Gemini CLI will recognize /test:gen and substitute the {{args}} in your prompt template with the provided argument (in this case, the requirement). The AI will then proceed to generate a Jest unit test accordingly. The description field is optional but is used when you run /help or /tools to list available commands.
This mechanism is extremely powerful - effectively, you can script the AI with natural language. The community has created numerous useful custom commands. For instance, Google’s DevRel team shared a set of 10 practical workflow commands (via an open-source repo) demonstrating how you can script common flows like creating API docs, cleaning data, or setting up boilerplate code. By defining a custom command, you package a complex prompt (or series of prompts) into a reusable shortcut.
Pro Tip: Custom commands can also be used to enforce formatting or apply a “persona” to the AI for certain tasks. For example, you might have a /review:security command that always prefaces the prompt with “You are a security auditor...” to review code for vulnerabilities. This approach ensures consistency in how the AI responds to specific categories of tasks.
To share commands with your team, you can commit the TOML files in your project’s repo (under .gemini/commands directory). Team members who have Gemini CLI will automatically pick up those commands when working in the project. This is a great way to standardize AI-assisted workflows across a team.
Tip 3: Extend Gemini with Your Own MCP Servers
Quick use-case: Suppose you want Gemini to interface with an external system or a custom tool that isn’t built-in - for example, query a proprietary database, or integrate with Figma designs. You can do this by running a custom Model Context Protocol (MCP) server and plugging it into Gemini CLI. MCP servers let you add new tools and abilities to Gemini, effectively extending the agent.
Gemini CLI comes with several MCP servers out-of-the-box (for instance, ones enabling Google Search, code execution sandboxes, etc.), and you can add your own. An MCP server is essentially an external process (it could be a local script, a microservice, or even a cloud endpoint) that speaks a simple protocol to handle tasks for Gemini. This architecture is what makes Gemini CLI so extensible.
Examples of MCP servers: Some community and Google-provided MCP integrations include a Figma MCP (to fetch design details from Figma), a Clipboard MCP (to read/write from your system clipboard), and others. In fact, in an internal demo, the Gemini CLI team showcased a “Google Docs MCP” server that allowed saving content directly to Google Docs. The idea is that whenever Gemini needs to perform an action that the built-in tools can’t handle, it can delegate to your MCP server.
Above is a demo of Gemini CLI being used with the Figma MCP for design => code
The Chrome DevTools MCP is also of course a favorite :)
How to add one: You can configure MCP servers via your settings.json or using the CLI. For a quick setup, try the CLI command:
gemini mcp add myserver --command "python3 my_mcp_server.py" --port 8080This would register a server named “myserver” that Gemini CLI will launch by running the given command (here a Python module) on port 8080. In ~/.gemini/settings.json, it would add an entry under mcpServers. For example:
“mcpServers”: { “myserver”: { “command”: “python3”, “args”: [”-m”, “my_mcp_server”, “--port”, “8080”], “cwd”: “./mcp_tools/python”, “timeout”: 15000 }}This configuration (based on the official docs) tells Gemini how to start the MCP server and where. Once running, the tools provided by that server become available to Gemini CLI. You can list all MCP servers and their tools with the slash command:
/mcpThis will show any registered servers and what tool names they expose.
Power of MCP: MCP servers can provide rich, multi-modal results. For instance, a tool served via MCP could return an image or a formatted table as part of the response to Gemini CLI. They also support OAuth 2.0, so you can securely connect to APIs (like Google’s APIs, GitHub, etc.) via an MCP tool without exposing credentials. Essentially, if you can code it, you can wrap it as an MCP tool - turning Gemini CLI into a hub that orchestrates many services.
Default vs. custom: By default, Gemini CLI’s built-in tools cover a lot (reading files, web search, executing shell commands, etc.), but MCP lets you go beyond. Some advanced users have created MCP servers to interface with internal systems or to perform specialized data processing. For example, you could have a database-mcp that provides a /query_db tool for running SQL queries on a company database, or a jira-mcp to create tickets via natural language.
When creating your own, be mindful of security: by default, custom MCP tools require confirmation unless you mark them as trusted. You can control safety with settings like trust: true for a server (which auto-approves its tool actions) or by whitelisting specific safe tools and blacklisting dangerous ones.
In short, MCP servers unlock limitless integration. They’re a pro feature that lets Gemini CLI become a glue between your AI assistant and whatever system you need it to work with. If you’re interested in building one, check out the official MCP guide and community examples.
Tip 4: Leverage Memory Addition & Recall
Quick use-case: Keep important facts at your AI’s fingertips by adding them to its long-term memory. For example, after figuring out a database port or an API token, you can do:
/memory add “Our staging RabbitMQ is on port 5673”This will store that fact so you (or the AI) don’t forget it later. You can then recall everything in memory with /memory show at any time.
The /memory commands provide a simple but powerful mechanism for persistent memory. When you use /memory add <text>, the given text is appended to your project’s global context (technically, it’s saved into the global ~/.gemini/GEMINI.md file or the project’s GEMINI.md.
It’s a bit like taking a note and pinning it to the AI’s virtual bulletin board. Once added, the AI will always see that note in the prompt context for future interactions, across sessions.
Consider an example: you’re debugging an issue and discover a non-obvious insight (”The config flag X_ENABLE must be set to true or the service fails to start”). If you add this to memory, later on if you or the AI are discussing a related problem, it won’t overlook this critical detail - it’s in the context.
Using /memory:
/memory add “<text>” - Add a fact or note to memory (persistent context). This updates the GEMINI.md immediately with the new entry.
/memory show - Display the full content of the memory (i.e. the combined context file that’s currently loaded).
/memory refresh - Reload the context from disk (useful if you manually edited the GEMINI.md file outside of Gemini CLI, or if multiple people are collaborating on it).
Because the memory is stored in Markdown, you can also manually edit the GEMINI.md file to curate or organize the info. The /memory commands are there for convenience during conversation, so you don’t have to open an editor.
Pro Tip: This feature is great for “decision logs.” If you decide on an approach or rule during a chat (e.g., a certain library to use, or an agreed code style), add it to memory. The AI will then recall that decision and avoid contradicting it later. It’s especially useful in long sessions that might span hours or days - by saving key points, you mitigate the model’s tendency to forget earlier context when the conversation gets long.
Another use is personal notes. Because ~/.gemini/GEMINI.md (global memory) is loaded for all sessions, you could put general preferences or information there. For example, “The user’s name is Alice. Speak politely and avoid slang.” It’s like configuring the AI’s persona or global knowledge. Just be aware that global memory applies to all projects, so don’t clutter it with project-specific info.
In summary, Memory Addition & Recall helps Gemini CLI maintain state. Think of it as a knowledge base that grows with your project. Use it to avoid repeating yourself or to remind the AI of facts it would otherwise have to rediscover from scratch.
Tip 5: Use Checkpointing and /restore as an Undo Button
Quick use-case: If Gemini CLI makes a series of changes to your files that you’re not happy with, you can instantly roll back to a prior state. Enable checkpointing when you start Gemini (or in settings), and use the /restore command to undo changes like a lightweight Git revert. /restore rolls back your workspace to the saved checkpoint; conversation state may be affected depending on how the checkpoint was captured.
Gemini CLI’s checkpointing feature acts as a safety net. When enabled, the CLI takes a snapshot of your project’s files before each tool execution that modifies files. If something goes wrong, you can revert to the last known good state. It’s essentially version control for the AI’s actions, without you needing to manually commit to Git each time.
How to use it: You can turn on checkpointing by launching the CLI with the --checkpointing flag:
gemini --checkpointingAlternatively, you can make it the default by adding to your config (“checkpointing”: { “enabled”: true } in settings.json). Once active, you’ll notice that each time Gemini is about to write to a file, it says something like “Checkpoint saved.”
If you then realize an AI-made edit is problematic, you have two options:
Run /restore list (or just /restore with no arguments) to see a list of recent checkpoints with timestamps and descriptions.
Run /restore <id> to rollback to a specific checkpoint. If you omit the id and there’s only one pending checkpoint, it will restore that by default.
For example:
/restoreGemini CLI might output:
0: [2025-09-22 10:30:15] Before running ‘apply_patch’
1: [2025-09-22 10:45:02] Before running ‘write_file’
You can then do /restore 0 to revert all file changes (and even the conversation context) back to how it was at that checkpoint. In this way, you can “undo” a mistaken code refactor or any other changes Gemini made.
What gets restored: The checkpoint captures the state of your working directory (all files that Gemini CLI is allowed to modify) and the workspace files (conversation state may also be rolled back depending on how the checkpoint was captured). When you restore, it overwrites files to the old version and resets the conversation memory to that snapshot. It’s like time-traveling the AI agent back to before it made the wrong turn. Note that it won’t undo external side effects (for example, if the AI ran a database migration, it can’t undo that), but anything in the file system and chat context is fair game.
Best practices: It’s a good idea to keep checkpointing on for non-trivial tasks. The overhead is small, and it provides peace of mind. If you find you don’t need a checkpoint (everything went well), you can always clear it or just let the next one overwrite it. The development team recommends using checkpointing especially before multi-step code edits. For mission-critical projects, though, you should still use a proper version control (git) as your primary safety net - consider checkpoints as a convenience for quick undo rather than a full VCS.
In essence, /restore lets you use Gemini CLI with confidence. You can let the AI attempt bold changes, knowing you have an “OH NO” button to rewind if needed.
Tip 6: Read Google Docs, Sheets, and More.
Quick use-case: Imagine you have a Google Doc or Sheet with some specs or data that you want the AI to use. Instead of copy-pasting the content, you can provide the link, and with a configured Workspace MCP server Gemini CLI can fetch and read it.
For example:
Summarize the requirements from this design doc: https://docs.google.com/document/d/<id>Gemini can pull in the content of that Doc and incorporate it into its response. Similarly, it can read Google Sheets or Drive files by link.
How this works: These capabilities are typically enabled via MCP integrations. Google’s Gemini CLI team is working on connectors for Google Workspace. One approach is running a small MCP server that uses Google’s APIs (Docs API, Sheets API, etc.) to retrieve document content when given a URL or ID. When configured, you might have slash commands or tools like /read_google_doc or simply an auto-detection that sees a Google Docs link and invokes the appropriate tool to fetch it.
For example, in an Agent Factory podcast demo, the team used a Google Docs MCP to save a summary directly to a doc - which implies they could also read the doc’s content in the first place. In practice, you might do something like:
@https://docs.google.com/document/d/XYZ12345Including a URL with @ (the context reference syntax) signals Gemini CLI to fetch that resource. With a Google Doc integration in place, the content of that document would be pulled in as if it were a local file. From there, the AI can summarize it, answer questions about it, or otherwise use it in the conversation.
Similarly, if you paste a Google Drive file link, a properly configured Drive tool could download or open that file (assuming permissions and API access are set up). Google Sheets could be made available via an MCP that runs queries or reads cell ranges, enabling you to ask things like “What’s the sum of the budget column in this Sheet [link]?” and have the AI calculate it.
Setting it up: As of this writing, the Google Workspace integrations may require some tinkering (obtaining API credentials, running an MCP server such as the one described by Kanshi Tanaike, etc.). Keep an eye on the official Gemini CLI repository and community forums for ready-to-use extensions - for example, an official Google Docs MCP might become available as a plugin/extension. If you’re eager, you can write one following guides on how to use Google APIs within an MCP server. It typically involves handling OAuth (which Gemini CLI supports for MCP servers) and then exposing tools like read_google_doc.
Usage tip: When you have these tools, using them can be as simple as providing the link in your prompt (the AI might automatically invoke the tool to fetch it) or using a slash command like /doc open <URL>. Check /tools to see what commands are available - Gemini CLI lists all tools and custom commands there.
In summary, Gemini CLI can reach out beyond your local filesystem. Whether it’s Google Docs, Sheets, Drive, or other external content, you can pull data in by reference. This pro tip saves you from manual copy-paste and keeps the context flow natural - just refer to the document or dataset you need, and let the AI grab what’s needed. It makes Gemini CLI a true knowledge assistant for all the information you have access to, not just the files on your disk.
(Note: Accessing private documents of course requires the CLI to have the appropriate permissions. Always ensure any integration respects security and privacy. In corporate settings, setting up such integrations might involve additional auth steps.)
Tip 7: Reference Files and Images with @ for Explicit Context
Quick use-case: Instead of describing a file’s content or an image verbally, just point Gemini CLI directly to it. Using the @ syntax, you can attach files, directories, or images into your prompt. This guarantees the AI sees exactly what’s in those files as context. For example:
Explain this code to me: @./src/main.jsThis will include the contents of src/main.js in the prompt (up to Gemini’s context size limits), so the AI can read it and explain it.
This @ file reference is one of Gemini CLI’s most powerful features for developers. It eliminates ambiguity - you’re not asking the model to rely on memory or guesswork about the file, you’re literally handing it the file to read. You can use this for source code, text documents, logs, etc. Similarly, you can reference entire directories:
Refactor the code in @./utils/ to use async/await.By appending a path that ends in a slash, Gemini CLI will recursively include files from that directory (within reason, respecting ignore files and size limits). This is great for multi-file refactors or analyses, as the AI can consider all relevant modules together.
Even more impressively, you can reference binary files like images in prompts. Gemini CLI (using the Gemini model’s multimodal capabilities) can understand images. For example:
Describe what you see in this screenshot: @./design/mockup.pngThe image will be fed into the model, and the AI might respond with something like “This is a login page with a blue sign-in button and a header image,” etc.. You can imagine the uses: reviewing UI mockups, organizing photos (as we’ll see in a later tip), or extracting text from images (Gemini can do OCR as well).
A few notes on using @ references effectively:
File limits: Gemini 2.5 Pro has a huge context window (up to 1 million tokens), so you can include quite large files or many files. However, extremely large files might be truncated. If a file is enormous (say, hundreds of thousands of lines), consider summarizing it or breaking it into parts. Gemini CLI will warn you if a reference is too large or if it skipped something due to size.
Automatic ignoring: By default, Gemini CLI respects your .gitignore and .geminiignore files when pulling in directory context. So if you @./ a project root, it will not dump huge ignored folders (like node_modules) into the prompt. You can customize ignore patterns with .geminiignore similarly to how .gitignore works.
Explicit vs implicit context: Taylor Mullen (the creator of Gemini CLI) emphasizes using @ for explicit context injection rather than relying on the model’s memory or summarizing things yourself. It’s more precise and ensures the AI isn’t hallucinating content. Whenever possible, point the AI to the source of truth (code, config files, documentation) with @ references. This practice can significantly improve accuracy.
Chaining references: You can include multiple files in one prompt, like:
Compare @./foo.py and @./bar.py and tell me differences.The CLI will include both files. Just be mindful of token limits; multiple large files might consume a lot of the context window.
Using @ is essentially how you feed knowledge into Gemini CLI on the fly. It turns the CLI into a multi-modal reader that can handle text and images. As a pro user, get into the habit of leveraging this - it’s often faster and more reliable than asking the AI something like “Open the file X and do Y” (which it may or may not do on its own). Instead, you explicitly give it X to work with.
Tip 8: On-the-Fly Tool Creation (Have Gemini Build Helpers)
Quick use-case: If a task at hand would benefit from a small script or utility, you can ask Gemini CLI to create that tool for you - right within your session. For example, you might say, “Write a Python script to parse all JSON files in this folder and extract the error fields.” Gemini can generate the script, which you can then execute via the CLI. In essence, you can dynamically extend the toolset as you go.
Gemini CLI is not limited to its pre-existing tools; it can use its coding abilities to fabricate new ones when needed. This often happens implicitly: if you ask for something complex, the AI might propose writing a temporary file (with code) and then running it. As a user, you can also guide this process explicitly:
Creating scripts: You can prompt Gemini to create a script or program in the language of your choice. It will likely use the write_file tool to create the file. For instance:
Generate a Node.js script that reads all ‘.log’ files in the current directory and reports the number of lines in each.Gemini CLI will draft the code, and with your approval, write it to a file (e.g. script.js). You can then run it by either using the ! shell command (e.g. !node script.js) or by asking Gemini CLI to execute it (the AI might automatically use run_shell_command to execute the script it just wrote, if it deems it part of the plan).
Temporary tools via MCP: In advanced scenarios, the AI might even suggest launching an MCP server for some specialized tasks. For example, if your prompt involves some heavy text processing that might be better done in Python, Gemini could generate a simple MCP server in Python and run it. While this is more rare, it demonstrates that the AI can set up a new “agent” on the fly. (One of the slides from the Gemini CLI team humorously referred to “MCP servers for everything, even one called LROwn” - suggesting you can have Gemini run an instance of itself or another model, though that’s more of a trick than a practical use!).
The key benefit here is automation. Instead of you manually stopping to write a helper script, you can let the AI do it as part of the flow. It’s like having an assistant who can create tools on-demand. This is especially useful for data transformation tasks, batch operations, or one-off computations that the built-in tools don’t directly provide.
Nuances and safety: When Gemini CLI writes code for a new tool, you should still review it before running. The /diff view (Gemini will show you the file diff before you approve writing it) is your chance to inspect the code. Ensure it does what you expect and nothing malicious or destructive (the AI shouldn’t produce something harmful unless your prompt explicitly asks, but just like any code from an AI, double-check logic, especially for scripts that delete or modify lots of data).
Example scenario: Let’s say you have a CSV file and you want to filter it in a complex way. You ask Gemini CLI to do it, and it might say: “I will write a Python script to parse the CSV and apply the filter.” It then creates filter_data.py. After you approve and it runs, you get your result, and you might never need that script again. This ephemeral creation of tools is a pro move - it shows the AI effectively extending its capabilities autonomously.
Pro Tip: If you find the script useful beyond the immediate context, you can promote it into a permanent tool or command. For instance, if the AI generated a great log-processing script, you might later turn it into a custom slash command (Tip #2) for easy reuse. The combination of Gemini’s generative power and the extension hooks means your toolkit can continuously evolve as you use the CLI.
In summary, don’t restrict Gemini to what it comes with. Treat it as a junior developer who can whip up new programs or even mini-servers to help solve the problem. This approach embodies the agentic philosophy of Gemini CLI - it will figure out what tools it needs, even if it has to code them on the spot.
Tip 9: Use Gemini CLI for System Troubleshooting & Configuration
Quick use-case: You can run Gemini CLI outside of a code project to help with general system tasks - think of it as an intelligent assistant for your OS. For example, if your shell is misbehaving, you could open Gemini in your home directory and ask: “Fix my .bashrc file, it has an error.” Gemini can then open and edit your config file for you.
This tip highlights that Gemini CLI isn’t just for coding projects - it’s your AI helper for your whole development environment. Many users have used Gemini to customize their dev setup or fix issues on their machine:
Editing dotfiles: You can load your shell configuration (.bashrc or .zshrc) by referencing it (@~/.bashrc) and then ask Gemini CLI to optimize or troubleshoot it. For instance, “My PATH isn’t picking up Go binaries, can you edit my .bashrc to fix that?” The AI can insert the correct export line. It will show you the diff for confirmation before saving changes.
Diagnosing errors: If you encounter a cryptic error in your terminal or an application log, you can copy it and feed it to Gemini CLI. It will analyze the error message and often suggest steps to resolve it. This is similar to how one might use StackOverflow or Google, but with the AI directly examining your scenario. For example: “When I run npm install, I get an EACCES permission error - how do I fix this?” Gemini might detect it’s a permissions issue in node_modules and guide you to change directory ownership or use a proper node version manager.
Running outside a project: By default, if you run gemini in a directory without a .gemini context, it just means no project-specific context is loaded - but you can still use the CLI fully. This is great for ad-hoc tasks like system troubleshooting. You might not have any code files for it to consider, but you can still run shell commands through it or let it fetch web info. Essentially, you’re treating Gemini CLI as an AI-powered terminal that can do things for you, not just chat.
Workstation customization: Want to change a setting or install a new tool? You can ask Gemini CLI, “Install Docker on my system” or “Configure my Git to sign commits with GPG.” The CLI will attempt to execute the steps. It might fetch instructions from the web (using the search tool) and then run the appropriate shell commands. Of course, always watch what it’s doing and approve the commands - but it can save time by automating multi-step setup processes. One real example: a user asked Gemini CLI to “set my macOS Dock preferences to auto-hide and remove the delay,” and the AI was able to execute the necessary defaults write commands.
Think of this mode as using Gemini CLI as a smart shell. In fact, you can combine this with Tip 16 (shell passthrough mode) - sometimes you might drop into ! shell mode to verify something, then go back to AI mode to have it analyze output.
Caveat: When doing system-level tasks, be cautious with commands that have widespread impact (like rm -rf or system config changes). Gemini CLI will usually ask for confirmation, and it doesn’t run anything without you seeing it. But as a power user, you should have a sense of what changes are being made. If unsure, ask Gemini to explain a command before running (e.g., “Explain what defaults write com.apple.dock autohide-delay -float 0 does” - it will gladly explain rather than just execute if you prompt it in that way).
Troubleshooting bonus: Another neat use is using Gemini CLI to parse logs or config files looking for issues. For instance, “Scan this Apache config for mistakes” (with @httpd.conf), or “Look through syslog for errors around 2 PM yesterday” (with an @/var/log/syslog if accessible). It’s like having a co-administrator. It can even suggest likely causes for crashes or propose fixes for common error patterns.
In summary, don’t hesitate to fire up Gemini CLI as your assistant for environment issues. It’s there to accelerate all your workflows - not just writing code, but maintaining the system that you write code on. Many users report that customizing their dev environment with Gemini’s help feels like having a tech buddy always on call to handle the tedious or complex setup steps.
Tip 10: YOLO Mode - Auto-Approve Tool Actions (Use with Caution)
Quick use-case: If you’re feeling confident (or adventurous), you can let Gemini CLI run tool actions without asking for your confirmation each time. This is YOLO mode (You Only Live Once). It’s enabled by the --yolo flag or by pressing Ctrl+Y during a session. In YOLO mode, as soon as the AI decides on a tool (like running a shell command or writing to a file), it executes it immediately, without that “Approve? (y/n)” prompt.
Why use YOLO mode? Primarily for speed and convenience when you trust the AI’s actions. Experienced users might toggle YOLO on if they’re doing a lot of repetitive safe operations. For example, if you ask Gemini to generate 10 different files one after another, approving each can slow down the flow; YOLO mode would just let them all be written automatically. Another scenario is using Gemini CLI in a completely automated script or CI pipeline - you might run it headless with --yolo so it doesn’t pause for confirmation.
To start in YOLO mode from the get-go, launch the CLI with:
gemini --yoloOr the short form gemini -y. You’ll see some indication in the CLI (like a different prompt or a notice) that auto-approve is on. During an interactive session, you can toggle it by pressing Ctrl+Y at any time - the CLI will usually display a message like “YOLO mode enabled (all actions auto-approved)” in the footer.
Big warning: YOLO mode is powerful but risky. The Gemini team themselves labels it for “daring users” - meaning you should be aware that the AI could potentially execute a dangerous command without asking. In normal mode, if the AI decided to run rm -rf / (worst-case scenario), you’d obviously decline. In YOLO mode, that command would run immediately (and likely ruin your day). While such extreme mistakes are unlikely (the AI’s system prompt includes safety guidelines), the whole point of confirmations is to catch any unwanted action. YOLO removes that safety net.
Best practices for YOLO: If you want some of the convenience without full risk, consider allow-listing specific commands. For example, you can configure in settings that certain tools or command patterns don’t require confirmation (like allowing all git commands, or read-only actions). In fact, Gemini CLI supports a config for skipping confirmation on specific commands: e.g., you can set something like “tools.shell.autoApprove”: [”git “, “npm test”] to always run those. This way, you might not need YOLO mode globally - you selectively YOLO only safe commands. Another approach: run Gemini in a sandbox or container when using YOLO, so even if it does something wild, your system is insulated (Gemini has a --sandbox flag to run tools in a Docker container).
Many advanced users toggle YOLO on and off frequently - turning it on when doing a string of minor file edits or queries, and off when about to do something critical. You can do the same, using the keyboard shortcut as a quick toggle.
In summary, YOLO mode eliminates friction at the cost of oversight. It’s a pro feature to use sparingly and wisely. It truly demonstrates trust in the AI (or recklessness!). If you’re new to Gemini CLI, you should probably avoid YOLO until you clearly understand the patterns of what it tends to do. If you do use it, double down on having version control or backups - just in case.
(If it’s any consolation, you’re not alone - many in the community joke about “I YOLO’ed and Gemini did something crazy.” So use it, but... well, you only live once.)
Tip 11: Headless & Scripting Mode (Run Gemini CLI in the Background)
Quick use-case: You can use Gemini CLI in scripts or automation by running it in headless mode. This means you provide a prompt (or even a full conversation) via command-line arguments or environment variables, and Gemini CLI produces an output and exits. It’s great for integrating with other tools or triggering AI tasks on a schedule.
For instance, to get a one-off answer without opening the REPL, you’ve seen you can use gemini -p “...prompt...”. This is already headless usage: it prints the model’s response and returns to the shell. But there’s more you can do:
System prompt override: If you want to run Gemini CLI with a custom system persona or instruction set (different from the default), you can use the environment variable GEMINI_SYSTEM_MD. By setting this, you tell Gemini CLI to ignore its built-in system prompt and use your provided file instead. For example:
export GEMINI_SYSTEM_MD=”/path/to/custom_system.md”gemini -p “Perform task X with high caution”This would load your custom_system.md as the system prompt (the “role” and rules the AI follows) before executing the prompt. Alternatively, if you set GEMINI_SYSTEM_MD=true, the CLI will look for a file named system.md in the current project’s .gemini directory. This feature is very advanced - it essentially allows you to replace the built-in brain of the CLI with your own instructions, which some users do for specialized workflows (like simulating a specific persona or enforcing ultra-strict policies). Use it carefully, as replacing the core prompt can affect tool usage (the core prompt contains important directions for how the AI selects and uses tools).
Direct prompt via CLI: Aside from -p, there’s also -i (interactive prompt) which starts a session with an initial prompt, and then keeps it open. For example: gemini -i “Hello, let’s debug something” will open the REPL and already have said hello to the model. This is useful if you want the first question to be asked immediately when starting.
Scripting with shell pipes: You can pipe not just text but also files or command outputs into Gemini. For example: gemini -p “Summarize this log:” < big_log.txt will feed the content of big_log.txt into the prompt (after the phrase “Summarize this log:”). Or you might do some_command | gemini -p “Given the above output, what went wrong?”. This technique allows you to compose Unix tools with AI analysis. It’s headless in the sense that it’s a single-pass operation.
Running in CI/CD: You could incorporate Gemini CLI into build processes. For instance, a CI pipeline might run a test and then use Gemini CLI to automatically analyze failing test output and post a comment. Using the -p flag and environment auth, this can be scripted. (Of course, ensure the environment has the API key or auth needed.)
One more headless trick: the --format=json flag (or config setting). Gemini CLI can output responses in JSON format instead of the human-readable text if you configure it. This is useful for programmatic consumption - your script can parse the JSON to get the answer or any tool actions details.
Why headless mode matters: It transforms Gemini CLI from an interactive assistant into a backend service or utility that other programs can call. You could schedule a cronjob that runs a Gemini CLI prompt nightly (imagine generating a report or cleaning up something with AI logic). You could wire up a button in an IDE that triggers a headless Gemini run for a specific task.
Example: Let’s say you want a daily summary of a news website. You could have a script:
gemini -p “Web-fetch \”https://news.site/top-stories\” and extract the headlines, then write them to headlines.txt”With --yolo perhaps, so it won’t ask confirmation to write the file. This would use the web fetch tool to get the page and the file write tool to save the headlines. All automatically, no human in the loop. The possibilities are endless once you treat Gemini CLI as a scriptable component.
In summary, Headless Mode enables automation. It’s the bridge between Gemini CLI and other systems. Mastering it means you can scale up your AI usage - not just when you’re typing in the terminal, but even when you aren’t around, your AI agent can do work for you.
(Tip: For truly long-running non-interactive tasks, you might also look into Gemini CLI’s “Plan” mode or how it can generate multi-step plans without intervention. However, those are advanced topics beyond this scope. In most cases, a well-crafted single prompt via headless mode can achieve a lot.)
Tip 12: Save and Resume Chat Sessions
Quick use-case: If you’ve been debugging an issue with Gemini CLI for an hour and need to stop, you don’t have to lose the conversation context. Use /chat save <name> to save the session. Later (even after restarting the CLI), you can use /chat resume <name> to pick up where you left off. This way, long-running conversations can be paused and continued seamlessly.
Gemini CLI essentially has a built-in chat session manager. The commands to know are:
/chat save <tag> - Saves the current conversation state under a tag/name you provide. The tag is like a filename or key for that session. Save often if you want, it will overwrite the tag if it exists. (Using a descriptive name is helpful - e.g., chat save fix-docker-issue.)
/chat list - Lists all your saved sessions (the tags you’ve used. This helps you remember what you named previous saves.
/chat resume <tag> - Resumes the session with that tag, restoring the entire conversation context and history to how it was when saved. It’s like you never left. You can then continue chatting from that point.
/chat share - (saves to file) This is useful as you can share the entire chat with someone else who can continue the session. Almost collaboration-like.
Under the hood, these sessions are stored likely in ~/.gemini/chats/ or a similar location. They include the conversation messages and any relevant state. This feature is super useful for cases such as:
Long debugging sessions: Sometimes debugging with an AI can be a long back-and-forth. If you can’t solve it in one go, save it and come back later (maybe with a fresh mind). The AI will still “remember” everything from before, because the whole context is reloaded.
Multi-day tasks: If you’re using Gemini CLI as an assistant for a project, you might have one chat session for “Refactor module X” that spans multiple days. You can resume that specific chat each day so the context doesn’t reset daily. Meanwhile, you might have another session for “Write documentation” saved separately. Switching contexts is just a matter of saving one and resuming the other.
Team hand-off: This is more experimental, but in theory, you could share the content of a saved chat with a colleague (the saved files are likely portable). If they put it in their .gemini directory and resume, they could see the same context. The practical simpler approach for collaboration is just copying the relevant Q&A from the log and using a shared GEMINI.md or prompt, but it’s interesting to note that the session data is yours to keep.
Usage example:
/chat save api-upgrade(Session saved as “api-upgrade”)
/quit(Later, reopen CLI)
$ geminigemini> /chat list(Shows: api-upgrade)
gemini> /chat resume api-upgradeNow the model greets you with the last exchange’s state ready. You can confirm by scrolling up that all your previous messages are present.
Pro Tip: Use meaningful tags when saving chats. Instead of /chat save session1, give it a name related to the topic (e.g. /chat save memory-leak-bug). This will help you find the right one later via /chat list. There is no strict limit announced on how many sessions you can save, but cleaning up old ones occasionally might be wise just for organization.
This feature turns Gemini CLI into a persistent advisor. You don’t lose knowledge gained in a conversation; you can always pause and resume. It’s a differentiator compared to some other AI interfaces that forget context when closed. For power users, it means you can maintain parallel threads of work with the AI. Just like you’d have multiple terminal tabs for different tasks, you can have multiple chat sessions saved and resume the one you need at any given time.
Tip 13: Multi-Directory Workspace - One Gemini, Many Folders
Quick use-case: Do you have a project split across multiple repositories or directories? You can launch Gemini CLI with access to all of them at once, so it sees a unified workspace. For example, if your frontend and backend are separate folders, you can include both so that Gemini can edit or reference files in both.
There are two ways to use multi-directory mode:
Launch flag: Use the --include-directories (or -I) flag when starting Gemini CLI. For example:
gemini --include-directories “../backend:../frontend”This assumes you run the command from, say, a scripts directory and want to include two sibling folders. You provide a colon-separated list of paths. Gemini CLI will then treat all those directories as part of one big workspace.
Persistent setting: In your settings.json, you can define “includeDirectories”: [”path1”, “path2”, [...]]. This is useful if you always want certain common directories loaded (e.g., a shared library folder that multiple projects use). The paths can be relative or absolute. Environment variables in the paths (like ~/common-utils) are allowed.
When multi-dir mode is active, the CLI’s context and tools consider files across all included locations. The > /directory show command will list which directories are in the current workspace. You can also dynamically add directories during a session with /directory add [<path>] - it will then load that on the fly (potentially scanning it for context like it does on startup).
Why use multi-directory mode? In microservice architectures or modular codebases, it’s common that one piece of code lives in one repo and another piece in a different repo. If you only ran Gemini in one, it wouldn’t “see” the others. By combining them, you enable cross-project reasoning. For example, you could ask, “Update the API client in the frontend to match the backend’s new API endpoints” - Gemini can open the backend folder to see the API definitions and simultaneously open the frontend code to modify it accordingly. Without multi-dir, you’d have to do one side at a time and manually carry info over.
Example: Let’s say you have client/ and server/. You start:
cd clientgemini --include-directories “../server”Now at the gemini> prompt, if you do > !ls, you’ll see it can list files in both client and server (it might show them as separate paths). You could do:
Open server/routes/api.py and client/src/api.js side by side to compare function names.The AI will have access to both files. Or you might say:
The API changed: the endpoint “/users/create” is now “/users/register”. Update both backend and frontend accordingly.It can simultaneously create a patch in the backend route and adjust the frontend fetch call.
Under the hood, Gemini merges the file index of those directories. There might be some performance considerations if each directory is huge, but generally it handles multiple small-medium projects fine. The cheat sheet notes that this effectively creates one workspace with multiple roots.
Tip within a tip: Even if you don’t use multi-dir all the time, know that you can still reference files across the filesystem by absolute path in prompts (@/path/to/file). However, without multi-dir, Gemini might not have permission to edit those or know to load context from them proactively. Multi-dir formally includes them in scope so it’s aware of all files for tasks like search or code generation across the whole set.
Remove directories: If needed, /directory remove <path> (or a similar command) can drop a directory from the workspace. This is less common, but maybe if you included something accidentally, you can remove it.
In summary, multi-directory mode unifies your context. It’s a must-have for polyrepo projects or any situation where code is split up. It makes Gemini CLI act more like an IDE that has your entire solution open. As a pro user, this means no part of your project is out of the AI’s reach.
Tip 14: Organize and Clean Up Your Files with AI Assistance
Quick use-case: Tired of a messy Downloads folder or disorganized project assets? You can enlist Gemini CLI to act as a smart organizer. By providing it an overview of a directory, it can classify files and even move them into subfolders (with your approval). For instance, “Clean up my Downloads: move images to an Images folder, PDFs to Documents, and delete temporary files.”
Because Gemini CLI can read file names, sizes, and even peek into file contents, it can make informed decisions about file organization. One community-created tool dubbed “Janitor AI” showcases this: it runs via Gemini CLI to categorize files as important vs junk, and groups them accordingly. The process involved scanning the directory, using Gemini’s reasoning on filenames and metadata (and content if needed), then moving files into categories. Notably, it didn’t automatically delete junk - rather, it moved them to a Trash folder for review.
Here’s how you might replicate such a workflow with Gemini CLI manually:
Survey the directory: Use a prompt to have Gemini list and categorize. For example:
List all files in the current directory and categorize them as “images”, “videos”, “documents”, “archives”, or “others”.Gemini might use !ls or similar to get the file list, then analyze the names/extensions to produce categories.
Plan the organization: Ask Gemini how it would like to reorganize. For example:
Propose a new folder structure for these files. I want to separate by type (Images, Videos, Documents, etc.). Also identify any files that seem like duplicates or unnecessary.The AI might respond with a plan: e.g., “Create folders: Images/, Videos/, Documents/, Archives/. Move X.png, Y.jpg to Images/; move A.mp4 to Videos/; etc. The file temp.txt looks unnecessary (maybe a temp file).”
Execute moves with confirmation: You can then instruct it to carry out the plan. It may use shell commands like mv for each file. Since this modifies your filesystem, you’ll get confirmation prompts for each (unless you YOLO it). Carefully approve the moves. After completion, your directory will be neatly organized as suggested.
Throughout, Gemini’s natural language understanding is key. It can reason, for instance, that IMG_001.png is an image or that presentation.pdf is a document, even if not explicitly stated. It can even open an image (using its vision capability) to see what’s in it - e.g., differentiating between a screenshot vs a photo vs an icon - and name or sort it accordingly.
Renaming files by content: A particularly magical use is having Gemini rename files to be more descriptive. The Dev Community article “7 Insane Gemini CLI Tips” describes how Gemini can scan images and automatically rename them based on their content. For example, a file named IMG_1234.jpg might be renamed to login_screen.jpg if the AI sees it’s a screenshot of a login screen. To do this, you could prompt:
For each .png image here, look at its content and rename it to something descriptive.Gemini will open each image (via vision tool), get a description, then propose a mv IMG_1234.png login_screen.png action. This can dramatically improve the organization of assets, especially in design or photo folders.
Two-pass approach: The Janitor AI discussion noted a two-step process: first broad categorization (important vs junk vs other), then refining groups. You can emulate this: first separate files that likely can be deleted (maybe large installer .dmg files or duplicates) from those to keep. Then focus on organizing the keepers. Always double-check what the AI flags as junk; its guess might not always be right, so manual oversight is needed.
Safety tip: When letting the AI loose on file moves or deletions, have backups or at least be ready to undo (with /restore or your own backup). It’s wise to do a dry-run: ask Gemini to print the commands it would run to organize, without executing them, so you can review. For instance: “List the mv and mkdir commands needed for this plan, but don’t execute them yet.” Once you review the list, you can either copy-paste execute them, or instruct Gemini to proceed.
This is a prime example of using Gemini CLI for “non-obvious” tasks - it’s not just writing code, it’s doing system housekeeping with AI smarts. It can save time and bring a bit of order to chaos. After all, as developers we accumulate clutter (logs, old scripts, downloads), and an AI janitor can be quite handy.
Tip 15: Compress Long Conversations to Stay Within Context
Quick use-case: If you’ve been chatting with Gemini CLI for a long time, you might hit the model’s context length limit or just find the session getting unwieldy. Use the /compress command to summarize the conversation so far, replacing the full history with a concise summary. This frees up space for more discussion without starting from scratch.
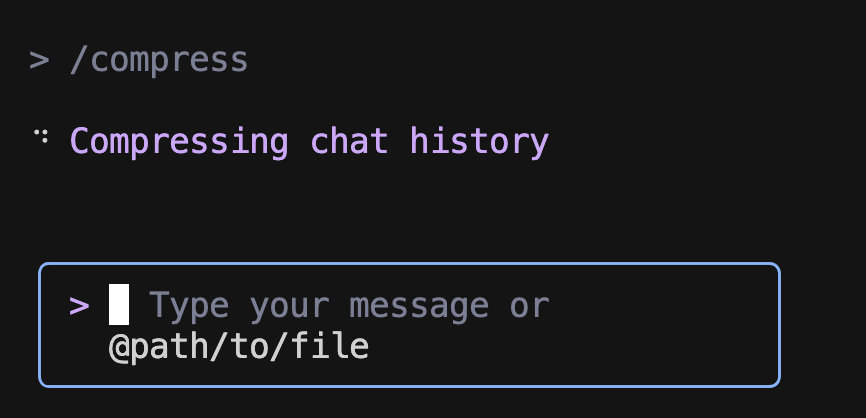
Large language models have a fixed context window (Gemini 2.5 Pro’s is very large, but not infinite). If you exceed it, the model may start forgetting earlier messages or lose coherence. The /compress feature is essentially an AI-generated tl;dr of your session that keeps important points.
How it works: When you type /compress, Gemini CLI will take the entire conversation (except system context) and produce a summary. It then replaces the chat history with that summary as a single system or assistant message, preserving essential details but dropping minute-by-minute dialogue. It will indicate that compression happened. For example, after /compress, you might see something like:
--- Conversation compressed ---
Summary of discussion: The user and assistant have been debugging a memory leak in an application. Key points: The issue is likely in DataProcessor.js, where objects aren’t being freed. The assistant suggested adding logging and identified a possible infinite loop. The user is about to test a fix.
--- End of summary ---
From that point on, the model only has that summary (plus new messages) as context for what happened before. This usually is enough if the summary captured the salient info.
When to compress: Ideally before you hit the limit. If you notice the session is getting lengthy (several hundred turns or a lot of code in context), compress proactively. The cheat sheet mentions an automatic compression setting (e.g., compress when context exceeds 60% of max). If you enable that, Gemini might auto-compress and let you know. Otherwise, manual /compress is in your toolkit.
After compressing: You can continue the conversation normally. If needed, you can compress multiple times in a very long session. Each time, you lose some granularity, so don’t compress too frequently for no reason - you might end up with an overly brief remembrance of a complex discussion. But generally the model’s own summarization is pretty good at keeping the key facts (and you can always restate anything critical yourself).
Context window example: Let’s illustrate. Suppose you fed in a large codebase by referencing many files and had a 1M token context (the max). If you then want to shift to a different part of the project, rather than starting a new session (losing all that understanding), you could compress. The summary will condense the knowledge gleaned from the code (like “We loaded modules A, B, C. A has these functions... B interacts with C in these ways...”). Now you can proceed to ask about new things with that knowledge retained abstractly.
Memory vs Compression: Note that compression doesn’t save to long-term memory, it’s local to the conversation. If you have facts you never want lost, consider Tip 4 (adding to /memory) - because memory entries will survive compression (they’ll just be reinserted anyway since they are in GEMINI.md context). Compression is more about ephemeral chat content.
A minor caution: after compression, the AI’s style might slightly change because it’s effectively seeing a “fresh” conversation with a summary. It might reintroduce itself or change tone. You can instruct it like “Continue from here... (we compressed)” to smooth it out. In practice, it often continues fine.
To summarize (pun intended), use /compress as your session grows long to maintain performance and relevance. It helps Gemini CLI focus on the bigger picture instead of every detail of the conversation’s history. This way, you can have marathon debugging sessions or extensive design discussions without running out of the “mental paper” the AI is writing on.
Tip 16: Passthrough Shell Commands with ! (Talk to Your Terminal)
Quick use-case: At any point in a Gemini CLI session, you can run actual shell commands by prefixing them with !. For example, if you want to check the git status, just type !git status and it will execute in your terminal. This saves you from switching windows or context - you’re still in the Gemini CLI, but you’re essentially telling it “let me run this command real quick.”
This tip is about Shell Mode in Gemini CLI. There are two ways to use it:
Single command: Just put ! at the start of your prompt, followed by any command and arguments. This will execute that command in the current working directory and display the output in-line. For example:
!ls -lh src/will list the files in the src directory, outputting something like you’d see in a normal terminal. After the output, the Gemini prompt returns so you can continue chatting or issue more commands.
Persistent shell mode: If you enter ! alone and hit Enter, Gemini CLI switches into a sub-mode where you get a shell prompt (often it looks like shell> or similar. Now you can type multiple shell commands interactively. It’s basically a mini-shell within the CLI. You exit this mode by typing ! on an empty line again (or exit). For instance:
!shell> pwd/home/alice/projectshell> python --versionPython 3.x.xshell> !After the final !, you’re back to the normal Gemini prompt.
Why is this useful? Because development is a mix of actions and inquiries. You might be discussing something with the AI and realize you need to compile the code or run tests to see something. Instead of leaving the conversation, you can quickly do it and feed the result back into the chat. In fact, Gemini CLI often does this for you as part of its tool usage (it might automatically run !pytest when you ask to fix tests, for example). But as the user, you have full control to do it manually too.
Examples:
After Gemini suggests a fix in code, you can do !npm run build to see if it compiles, then copy any errors and ask Gemini to help with those.
If you want to open a file in vim or nano, you could even launch it via !nano filename (though note that since Gemini CLI has its own interface, using an interactive editor inside it might be a bit awkward - better to use the built-in editor integration or copy to your editor).
You can use shell commands to gather info for the AI: e.g., !grep TODO -R . to find all TODOs in the project, then you might ask Gemini to help address those TODOs.
Or simply use it for environment tasks: !pip install some-package if needed, etc., without leaving the CLI.
Seamless interplay: One cool aspect is how the conversation can refer to outputs. For example, you could do !curl http://example.com to fetch some data, see the output, then immediately say to Gemini, “Format the above output as JSON” - since the output was printed in the chat, the AI has it in context to work with (provided it’s not too large).
Terminal as a default shell: If you find yourself always prefacing commands with !, you can actually make the shell mode persistent by default. One way is launching Gemini CLI with a specific tool mode (there’s a concept of default tool). But easier: just drop into shell mode (! with nothing) at session start if you plan to run a lot of manual commands and only occasionally talk to AI. Then you can exit shell mode whenever you want to ask a question. It’s almost like turning Gemini CLI into your normal terminal that happens to have an AI readily available.
Integration with AI planning: Sometimes Gemini CLI itself will propose to run a shell command. If you approve, it effectively does the same as !command. Understanding that, you know you can always intervene. If Gemini is stuck or you want to try something, you don’t have to wait for it to suggest - you can just do it and then continue.
In summary, the ! passthrough means you don’t have to leave Gemini CLI for shell tasks. It collapses the boundary between chatting with the AI and executing commands on your system. As a pro user, this is fantastic for efficiency - your AI and your terminal become one continuous environment.
Tip 17: Treat Every CLI Tool as a Potential Gemini Tool
Quick use-case: Realize that Gemini CLI can leverage any command-line tool installed on your system as part of its problem-solving. The AI has access to the shell, so if you have cURL, ImageMagick, git, Docker, or any other tool, Gemini can invoke it when appropriate. In other words, your entire $PATH is the AI’s toolkit. This greatly expands what it can do - far beyond its built-in tools.
For example, say you ask: “Convert all PNG images in this folder to WebP format.” If you have ImageMagick’s convert utility installed, Gemini CLI might plan something like: use a shell loop with convert command for each file. Indeed, one of the earlier examples from a blog showed exactly this, where the user prompted to batch-convert images, and Gemini executed a shell one-liner with the convert tool.
Another scenario: “Deploy my app to Docker.” If Docker CLI is present, the AI could call docker build and docker run steps as needed. Or “Use FFmpeg to extract audio from video.mp4“ - it can construct the ffmpeg command.
This tip is about mindset: Gemini isn’t limited to what’s coded into it (which is already extensive). It can figure out how to use other programs available to achieve a goal. It knows common syntax and can read help texts if needed (it could call --help on a tool). The only limitation is safety: by default, it will ask confirmation for any run_shell_command it comes up with. But as you become comfortable, you might allow certain benign commands automatically (see YOLO or allowed-tools config).
Be mindful of the environment: “With great power comes great responsibility.” Since every shell tool is fair game, you should ensure that your $PATH doesn’t include anything you wouldn’t want the AI to run inadvertently. This is where Tip 19 (custom PATH) comes in - some users create a restricted $PATH for Gemini, so it can’t, say, directly call system destructive commands or maybe not call gemini recursively (to avoid loops). The point is, by default if gcc or terraform or anything is in $PATH, Gemini could invoke it. It doesn’t mean it will randomly do so - only if the task calls for it - but it’s possible.
Train of thought example: Imagine you ask Gemini CLI: “Set up a basic HTTP server that serves the current directory.” The AI might think: “I can use Python’s built-in server for this.” It then issues !python3 -m http.server 8000. Now it just used a system tool (Python) to launch a server. That’s an innocuous example. Another: “Check the memory usage on this Linux system.” The AI might use the free -h command or read from /proc/meminfo. It’s effectively doing what a sysadmin would do, by using available commands.
All tools are extensions of the AI: This is somewhat futuristic, but consider that any command-line program can be seen as a “function” the AI can call to extend its capability. Need to solve a math problem? It could call bc (calculator). Need to manipulate an image? It could call an image processing tool. Need to query a database? If the CLI client is installed and credentials are there, it can use it. The possibilities are expansive. In other AI agent frameworks, this is known as tool use, and Gemini CLI is designed with a lot of trust in its agent to decide the right tool.
When it goes wrong: The flip side is if the AI misunderstands a tool or has a hallucination about one. It might try to call a command that doesn’t exist, or use wrong flags, resulting in errors. This isn’t a big deal - you’ll see the error and can correct or clarify. In fact, the system prompt of Gemini CLI likely guides it to first do a dry-run (just propose the command) rather than executing blindly. So you often get a chance to catch these. Over time, the developers are improving the tool selection logic to reduce these missteps.
The main takeaway is to think of Gemini CLI as having a very large Swiss Army knife - not just the built-in blades, but every tool in your OS. You don’t have to instruct it on how to use them if it’s something standard; usually it knows or can find out. This significantly amplifies what you can accomplish. It’s like having a junior dev or devops engineer who knows how to run pretty much any program you have installed.
As a pro user, you can even install additional CLI tools specifically to give Gemini more powers. For example, if you install a CLI for a cloud service (AWS CLI, GCloud CLI, etc.), in theory Gemini can utilize it to manage cloud resources if prompted to. Always ensure you understand and trust the commands run, especially with powerful tools (you wouldn’t want it spinning up huge cloud instances accidentally). But used wisely, this concept - everything is a Gemini tool - is what makes it exponentially more capable as you integrate it into your environment.
Tip 18: Utilize Multimodal AI - Let Gemini See Images and More
Quick use-case: Gemini CLI isn’t limited to text - it’s multimodal. This means it can analyze images, diagrams, or even PDFs if given. Use this to your advantage. For instance, you could say “Here’s a screenshot of an error dialog, @./error.png - help me troubleshoot this.” The AI will “see” the image and respond accordingly.
One of the standout features of Google’s Gemini model (and its precursor PaLM2 in Codey form) is image understanding. In Gemini CLI, if you reference an image with @, the model receives the image data. It can output descriptions, classifications, or reason about the image’s content. We already discussed renaming images by content (Tip 14) and describing screenshots (Tip 7). But let’s consider other creative uses:
UI/UX feedback: If you’re a developer working with designers, you can drop a UI image and ask Gemini for feedback or to generate code. “Look at this UI mockup @mockup.png and produce a React component structure for it.” It could identify elements in the image (header, buttons, etc.) and outline code.
Organizing images: Beyond renaming, you might have a folder of mixed images and want to sort by content. “Sort the images in ./photos/ into subfolders by theme (e.g., sunsets, mountains, people).” The AI can look at each photo and categorize it (this is similar to what some photo apps do with AI - now you can do it with your own script via Gemini).
OCR and data extraction: If you have a screenshot of error text or a photo of a document, Gemini can often read the text from it. For example, “Extract the text from invoice.png and put it into a structured format.” As shown in a Google Cloud blog example, Gemini CLI can process a set of invoice images and output a table of their info. It basically did OCR + understanding to get invoice numbers, dates, amounts from pictures of invoices. That’s an advanced use-case but entirely possible with the multimodal model under the hood.
Understanding graphs or charts: If you have a graph screenshot, you could ask “Explain this chart’s key insights @chart.png.” It might interpret the axes and trends. Accuracy can vary, but it’s a nifty try.
To make this practical: when you @image.png, ensure the image isn’t too huge (though the model can handle reasonably large images). The CLI will likely encode it and send it to the model. The response might include descriptions or further actions. You can mix text and image references in one prompt too.
Non-image modalities: The CLI and model potentially can handle PDFs and audio too, by converting them via tools. For example, if you @report.pdf, Gemini CLI might use a PDF-to-text tool under the hood to extract text and then summarize. If you @audio.mp3 and ask for a transcript, it might use an audio-to-text tool (like a speech recognition function). The cheat sheet suggests referencing PDFs, audio, video files is supported, presumably by invoking appropriate internal tools or APIs. So, “transcribe this interview audio: @interview.wav“ could actually work (if not now, likely soon, since underlying Google APIs for speech-to-text could be plugged in).
Rich outputs: Multimodal also means the AI can return images in responses if integrated (though in CLI it usually won’t display them directly, but it could save an image file or output ASCII art, etc.). The MCP capability mentioned that tools can return images. For instance, an AI drawing tool could generate an image and Gemini CLI could present it (maybe by opening it or giving a link).
Important: The CLI itself is text-based, so you won’t see the image in the terminal (unless it’s capable of ASCII previews). You’ll just get the analysis. So this is mostly about reading images, not displaying them. If you’re in VS Code integration, it might show images in the chat view.
In summary, don’t forget the “I” in GUI when using Gemini CLI - it can handle the visual just as well as the textual in many cases. This opens up workflows like visual debugging, design help, data extraction from screenshots, etc., all under the same tool. It’s a differentiator that some other CLI tools may not have yet. And as models improve, this multimodal support will only get more powerful, so it’s a future-proof skill to exploit.
Tip 19: Customize the $PATH (and Tool Availability) for Stability
Quick use-case: If you ever find Gemini CLI getting confused or invoking the wrong programs, consider running it with a tailored $PATH. By limiting or ordering the available executables, you can prevent the AI from, say, calling a similarly named script that you didn’t intend. Essentially, you sandbox its tool access to known-good tools.
For most users, this isn’t an issue, but for pro users with lots of custom scripts or multiple versions of tools, it can be helpful. One reason mentioned by the developers is avoiding infinite loops or weird behavior. For example, if gemini itself is in $PATH, an AI gone awry might recursively call gemini from within Gemini (a strange scenario, but theoretically possible). Or perhaps you have a command named test that conflicts with something - the AI might call the wrong one.
How to set PATH for Gemini: Easiest is inline on launch:
PATH=/usr/bin:/usr/local/bin geminiThis runs Gemini CLI with a restricted $PATH of just those directories. You might exclude directories where experimental or dangerous scripts lie. Alternatively, create a small shell script wrapper that purges or adjusts $PATH then exec’s gemini.
Another approach is using environment or config to explicitly disable certain tools. For instance, if you absolutely never want the AI to use rm or some destructive tool, you could technically create an alias or dummy rm in a safe $PATH that does nothing (though this could interfere with normal operations, so maybe not that one). A better method is the exclude list in settings. In an extension or settings.json, you can exclude tool names. E.g.,
“excludeTools”: [”run_shell_command”]This extreme example would stop all shell commands from running (making Gemini effectively read-only). More granular, there was mention of skipping confirmation for some; similarly you might configure something like:
“tools”: { “exclude”: [”apt-get”, “shutdown”]}(This syntax is illustrative; consult docs for exact usage.)
The principle is, by controlling the environment, you reduce risk of the AI doing something dumb with a tool it shouldn’t. It’s akin to child-proofing the house.
Prevent infinite loops: One user scenario was a loop where Gemini kept reading its own output or re-reading files repeatedly. Custom $PATH can’t directly fix logic loops, but one cause could be if the AI calls a command that triggers itself. Ensuring it can’t accidentally spawn another AI instance (like calling bard or gemini command, if it thought to do so) is good. Removing those from $PATH (or renaming them for that session) helps.
Isolation via sandbox: Another alternative to messing with $PATH is using --sandbox mode (which uses Docker or Podman to run tools in an isolated environment). In that case, the AI’s actions are contained and have only the tools that sandbox image provides. You could supply a Docker image with a curated set of tools. This is heavy-handed but very safe.
Custom PATH for specific tasks: You might have different $PATH setups for different projects. For example, in one project you want it to use a specific version of Node or a local toolchain. Launching gemini with the $PATH that points to those versions will ensure the AI uses the right one. Essentially, treat Gemini CLI like any user - it uses whatever environment you give it. So if you need it to pick gcc-10 vs gcc-12, adjust $PATH or CC env var accordingly.
In summary: Guard rails. As a power user, you have the ability to fine-tune the operating conditions of the AI. If you ever find a pattern of undesirable behavior tied to tool usage, tweaking $PATH is a quick remedy. For everyday use, you likely won’t need this, but it’s a pro tip to keep in mind if you integrate Gemini CLI into automation or CI: give it a controlled environment. That way, you know exactly what it can and cannot do, which increases reliability.
Tip 20: Track and reduce token spend with token caching and stats
If you run long chats or repeatedly attach the same big files, you can cut cost and latency by turning on token caching and monitoring usage. With an API key or Vertex AI auth, Gemini CLI automatically reuses previously sent system instructions and context, so follow‑up requests are cheaper. You can see the savings live in the CLI.
How to use it
Use an auth mode that enables caching. Token caching is available when you authenticate with a Gemini API key or Vertex AI. It is not available with OAuth login today. Google Gemini
Inspect your usage and cache hits. Run the stats command during a session. It shows total tokens and a cached field when caching is active.
/statsThe command’s description and cached reporting behavior are documented in the commands reference and FAQ. Google Gemini+1
Capture metrics in scripts. When running headless, output JSON and parse the stats block, which includes tokens.cached for each model:
gemini -p “Summarize README” --output-format jsonThe headless guide documents the JSON schema with cached token counts. Google Gemini
Save a session summary to file: For CI or budget tracking, write a JSON session summary to disk.
gemini -p “Analyze logs” --session-summary usage.jsonThis flag is listed in the changelog. Google Gemini
With API key or Vertex auth, the CLI automatically reuses previously sent context so later turns send fewer tokens. Keeping GEMINI.md and large file references stable across turns increases cache hits; you’ll see that reflected in stats as cached tokens.
Tip 21: Use /copy for Quick Clipboard Copy
Quick use-case: Instantly copy the latest answer or code snippet from Gemini CLI to your system clipboard, without any extraneous formatting or line numbers. This is perfect for quickly pasting AI-generated code into your editor or sharing a result with a teammate.
When Gemini CLI provides an answer (especially a multi-line code block), you often want to reuse it elsewhere. The /copy slash command makes this effortless by copying the last output produced by the CLI directly to your clipboard. Unlike manual selection (which can grab line numbers or prompt text), /copy grabs only the raw response content. For example, if Gemini just generated a 50-line Python script, simply typing /copy will put that entire script into your clipboard, ready to paste - no need to scroll and select text. Under the hood, Gemini CLI uses the appropriate clipboard utility for your platform (e.g. pbcopy on macOS, clip on Windows. Once you run the command, you’ll typically see a confirmation message, and then you can paste the copied text wherever you need it.
How it works: The /copy command requires that your system has a clipboard tool available. On macOS and Windows, the required tools (pbcopy and clip respectively) are usually pre-installed. On Linux, you may need to install xclip or xsel for /copy to function. After ensuring that, you can use /copy anytime after Gemini CLI prints an answer. It will capture the entire last response (even if it’s long) and omit any internal numbering or formatting the CLI may show on-screen. This saves you from dealing with unwanted artifacts when transferring the content. It’s a small feature, but a huge time-saver when you’re iterating on code or compiling a report generated by the AI.
Pro Tip: If you find the /copy command isn’t working, double-check that your clipboard utilities are installed and accessible. For instance, Ubuntu users should run sudo apt install xclip to enable clipboard copying. Once set up, /copy lets you share Gemini’s outputs with zero friction - copy, paste, and you’re done.
Tip 22: Master Ctrl+C for Shell Mode and Exiting
Quick use-case: Cleanly interrupt Gemini CLI or exit shell mode with a single keypress - and quit the CLI entirely with a quick double-tap - thanks to the versatile Ctrl+C shortcut. This gives you immediate control when you need to stop or exit.
Gemini CLI operates like a REPL, and knowing how to break out of operations is essential. Pressing Ctrl+C once will cancel the current action or clear any input you’ve started typing, essentially acting as an “abort” command. For example, if the AI is generating a lengthy answer and you’ve seen enough, hit Ctrl+C - the generation stops immediately. If you had started typing a prompt but want to discard it, Ctrl+C will wipe the input line so you can start fresh. Additionally, if you are in shell mode (activated by typing ! to run shell commands), a single Ctrl+C will exit shell mode and return you to the normal Gemini prompt (it sends an interrupt to the shell process running. This is extremely handy if a shell command is hanging or you simply want to get back to AI mode.
Pressing Ctrl+C twice in a row is the shortcut to exit Gemini CLI entirely. Think of it as “Ctrl+C to cancel, and Ctrl+C again to quit.” This double-tap signals the CLI to terminate the session (you’ll see a goodbye message or the program will close). It’s a faster alternative to typing /quit or closing the terminal window, allowing you to gracefully shut down the CLI from the keyboard. Do note that a single Ctrl+C will not quit if there’s input to clear or an operation to interrupt - it requires that second press (when the prompt is idle) to fully exit. This design prevents accidentally closing the session when you only meant to stop the current output.
Pro Tip: In shell mode, you can also press the Esc key to leave shell mode and return to Gemini’s chat mode without terminating the CLI. And if you prefer a more formal exit, the /quit command is always available to cleanly end the session. Lastly, Unix users can use Ctrl+D (EOF) at an empty prompt to exit as well - Gemini CLI will prompt for confirmation if needed. But for most cases, mastering the single- and double-tap of Ctrl+C is the quickest way to stay in control.
Tip 23: Customize Gemini CLI with settings.json
Quick use-case: Adapt the CLI’s behavior and appearance to your preferences or project conventions by editing the settings.json config file, instead of sticking with one-size-fits-all defaults. This lets you enforce things like theme, tool usage rules, or editor mode across all your sessions.
Gemini CLI is highly configurable. In your home directory (~/.gemini/) or project folder (.gemini/ within your repo), you can create a settings.json file to override default settings. Nearly every aspect of the CLI can be tuned here - from visual theme to tool permissions. The CLI merges settings from multiple levels: system-wide defaults, your user settings, and project-specific settings (project settings override user settings. For example, you might have a global preference for a dark theme, but a particular project might require stricter tool sandboxing; you can handle this via different settings.json files at each level.
Inside settings.json, options are specified as JSON key-value pairs. Here’s a snippet illustrating some useful customizations:
{“theme”: “GitHub”,“autoAccept”: false,“vimMode”: true,“sandbox”: “docker”,“includeDirectories”: [”../shared-library”, “~/common-utils”],“usageStatisticsEnabled”: true}In this example, we set the theme to “GitHub” (a popular color scheme), disable autoAccept (so the CLI will always ask before running potentially altering tools), enable Vim keybindings for the input editor, and enforce using Docker for tool sandboxing. We also added some directories to the workspace context (includeDirectories) so Gemini can see code in shared paths by default. Finally, we kept usageStatisticsEnabled true to collect basic usage stats (which feeds into telemetry, if enabled. There are many more settings available - like defining custom color themes, adjusting token limits, or whitelisting/blacklisting specific tools - all documented in the configuration guide. By tailoring these, you ensure Gemini CLI behaves optimally for your workflow (for instance, some developers always want vimMode on for efficiency, while others might prefer the default editor).
One convenient way to edit settings is via the built-in settings UI. Run the command /settings in Gemini CLI, and it will open an interactive editor for your configuration. This interface lets you browse and search settings with descriptions, and prevents JSON syntax errors by validating inputs. You can tweak colors, toggle features like yolo (auto-approval), adjust checkpointing (file save/restore behavior), and more through a friendly menu. Changes are saved to your settings.json, and some take effect immediately (others might require restarting the CLI).
Pro Tip: Maintain separate project-specific settings.json files for different needs. For example, on a team project you might set “sandbox”: “docker” and “excludeTools”: [”run_shell_command”] to lock down dangerous operations, while your personal projects might allow direct shell commands. Gemini CLI will automatically pick up the nearest .gemini/settings.json in your project directory tree and merge it with your global ~/.gemini/settings.json. Also, don’t forget you can quickly adjust visual preferences: try /theme to interactively switch themes without editing the file, which is great for finding a comfortable look. Once you find one, put it in settings.json to make it permanent.
Tip 24: Leverage IDE Integration (VS Code) for Context & Diffs
Quick use-case: Supercharge Gemini CLI by hooking it into VS Code - the CLI will automatically know which files you’re working on and even open AI-proposed code changes in VS Code’s diff editor for you. This creates a seamless loop between AI assistant and your coding workspace.
One of Gemini CLI’s powerful features is its IDE integration with Visual Studio Code. By installing the official Gemini CLI Companion extension in VS Code and connecting it, you allow Gemini CLI to become “context-aware” of your editor. What does this mean in practice? When connected, Gemini knows about the files you have open, your current cursor location, and any text you’ve selected in VS Code. All that information is fed into the AI’s context. So if you ask, “Explain this function,” Gemini CLI can see the exact function you’ve highlighted and give a relevant answer, without you needing to copy-paste code into the prompt. The integration shares up to your 10 most recently opened files, plus selection and cursor info, giving the model a rich understanding of your workspace.
Another huge benefit is native diffing of code changes. When Gemini CLI suggests modifications to your code (for example, “refactor this function” and it produces a patch), it can open those changes in VS Code’s diff viewer automatically. You’ll see a side-by-side diff in VS Code showing the proposed edits. You can then use VS Code’s familiar interface to review the changes, make any manual tweaks, and even accept the patch with a click. The CLI and editor stay in sync - if you accept the diff in VS Code, Gemini CLI knows and continues the session with those changes applied. This tight loop means you no longer have to copy code from the terminal to your editor; the AI’s suggestions flow straight into your development environment.
How to set it up: If you start Gemini CLI inside VS Code’s integrated terminal, it will detect VS Code and usually prompt you to install/connect the extension automatically. You can agree and it will run the necessary /ide install step. If you don’t see a prompt (or you’re enabling it later), simply open Gemini CLI and run the command: /ide install. This will fetch and install the “Gemini CLI Companion” extension into VS Code for you. Next, run /ide enable to establish the connection - the CLI will then indicate it’s linked to VS Code. You can verify at any time with /ide status, which will show if it’s connected and list which editor and files are being tracked. From then on, Gemini CLI will automatically receive context from VS Code (open files, selections) and will open diffs in VS Code when needed. It essentially turns Gemini CLI into an AI pair programmer that lives in your terminal but operates with full awareness of your IDE.
Currently, VS Code is the primary supported editor for this integration. (Other editors that support VS Code extensions, like VSCodium or some JetBrains via a plugin, may work via the same extension, but officially it’s VS Code for now.) The design is open though - there’s an IDE Companion Spec for developing similar integrations with other editors. So down the road we might see first-class support for IDEs like IntelliJ or Vim via community extensions.
Pro Tip: Once connected, you can use VS Code’s Command Palette to control Gemini CLI without leaving the editor. For example, press Ctrl+Shift+P (Cmd+Shift+P on Mac) and try commands like “Gemini CLI: Run” (to launch a new CLI session in the terminal), “Gemini CLI: Accept Diff” (to approve and apply an open diff), or “Gemini CLI: Close Diff Editor” (to reject changes. These shortcuts can streamline your workflow even further. And remember, you don’t always have to start the CLI manually - if you enable the integration, Gemini CLI essentially becomes an AI co-developer inside VS Code, watching context and ready to help as you work on code.
Tip 25: Automate Repo Tasks with Gemini CLI GitHub Action
Quick use-case: Put Gemini to work on GitHub - use the Gemini CLI GitHub Action to autonomously triage new issues and review pull requests in your repository, acting as an AI teammate that handles routine dev tasks.
Gemini CLI isn’t just for interactive terminal sessions; it can also run in CI/CD pipelines via GitHub Actions. Google has provided a ready-made Gemini CLI GitHub Action (currently in beta) that integrates into your repo’s workflows.
This effectively deploys an AI agent into your project on GitHub. It runs in the background, triggered by repository events. For example, when someone opens a new issue, the Gemini Action can automatically analyze the issue description, apply relevant labels, and even prioritize it or suggest duplicates (this is the “intelligent issue triage” workflow. When a pull request is opened, the Action kicks in to provide an AI code review - it will comment on the PR with insights about code quality, potential bugs, or stylistic improvements. This gives maintainers immediate feedback on the PR before any human even looks at it. Perhaps the coolest feature is on-demand collaboration: team members can mention @gemini-cli in an issue or PR comment and give it an instruction, like “@gemini-cli please write unit tests for this”. The Action will pick that up and Gemini CLI will attempt to fulfill the request (adding a commit with new tests, for instance. It’s like having an AI assistant living in your repo, ready to do chores when asked.
Setting up the Gemini CLI GitHub Action is straightforward. First, ensure you have Gemini CLI version 0.1.18 or later installed locally (this ensures compatibility with the Action. Then, in Gemini CLI run the special command: /setup-github. This command generates the necessary workflow files in your repository (it will guide you through authentication if needed). Specifically, it adds YAML workflow files (for issue triage, PR review, etc.) under .github/workflows/. You will need to add your Gemini API key to the repo’s secrets (as GEMINI_API_KEY) so the Action can use the Gemini API. Once that’s done and the workflows are committed, the GitHub Action springs to life - from that point on, Gemini CLI will autonomously respond to new issues and PRs according to those workflows.
Because this Action is essentially running Gemini CLI in an automated way, you can customize it just like you would your CLI. The default setup comes with three workflows (issue triage, PR review, and a general mention-triggered assistant) which are **fully open-source and editable**. You can tweak the YAML to adjust what the AI does, or even add new workflows. For instance, you might create a nightly workflow that uses Gemini CLI to scan your repository for outdated dependencies or to update a README based on recent code changes - the possibilities are endless. The key benefit here is offloading mundane or time-consuming tasks to an AI agent so that human developers can focus on harder problems. And since it runs on GitHub’s infrastructure, it doesn’t require your intervention - it’s truly a “set and forget” AI helper.
Pro Tip: Keep an eye on the Action’s output in the GitHub Actions logs for transparency. The Gemini CLI Action logs will show what prompts it ran and what changes it made or suggested. This can both build trust and help you refine its behavior. Also, the team has built enterprise-grade safeguards into the Action - e.g., you can require that all shell commands the AI tries to run in a workflow are allow-listed by you. So don’t hesitate to use it even on serious projects. And if you come up with a cool custom workflow using Gemini CLI, consider contributing it back to the community - the project welcomes new ideas in their repo!
Tip 26: Enable Telemetry for Insights and Observability
Quick use-case: Gain deeper insight into how Gemini CLI is being used and performing by turning on its built-in OpenTelemetry instrumentation - monitor metrics, logs, and traces of your AI sessions to analyze usage patterns or troubleshoot issues.
For developers who like to measure and optimize, Gemini CLI offers an observability feature that exposes what’s happening under the hood. By leveraging OpenTelemetry (OTEL), Gemini CLI can emit structured telemetry data about your sessions. This includes things like metrics (e.g. how many tokens used, response latency), logs of actions taken, and even traces of tool calls. With telemetry enabled, you can answer questions like: Which custom command do I use most often? How many times did the AI edit files in this project this week? What’s the average response time when I ask the CLI to run tests? Such data is invaluable for understanding usage patterns and performance. Teams can use it to see how developers are interacting with the AI assistant and where bottlenecks might be.
By default, telemetry is off (Gemini respects privacy and performance). You can opt-in by setting “telemetry.enabled”: true in your settings.json or by starting Gemini CLI with the flag --telemetry. Additionally, you choose the target for the telemetry data: it can be logged locally or sent to a backend like Google Cloud. For a quick start, you might set “telemetry.target”: “local” - with this, Gemini will simply write telemetry data to a local file (by default) or to a custom path you specify via [”outfile”]. The local telemetry includes JSON logs you can parse or feed into tools. For more robust monitoring, set “target”: “gcp” (Google Cloud) or even integrate with other OpenTelemetry-compatible systems like Jaeger or Datadog. In fact, Gemini CLI’s OTEL support is vendor-neutral - you can export data to just about any observability stack you prefer (Google Cloud Operations, Prometheus, etc.. Google provides a streamlined path for Cloud: if you point to GCP, the CLI can send data directly to Cloud Logging and Cloud Monitoring in your project, where you can use the usual dashboards and alerting tools.
What kind of insights can you get? The telemetry captures events like tool executions, errors, and important milestones. It also records metrics such as prompt processing time and token counts per prompt. For usage analytics, you might aggregate how many times each slash command is used across your team, or how often code generation is invoked. For performance monitoring, you could track if responses have gotten slower, which might indicate hitting API rate limits or model changes. And for debugging, you can see errors or exceptions thrown by tools (e.g., a run_shell_command failure) logged with context. All this data can be visualized if you send it to a platform like Google Cloud’s Monitoring - for example, you can create a dashboard of “tokens used per day” or “error rate of tool X”. It essentially gives you a window into the AI’s “brain” and your usage, which is especially helpful in enterprise settings to ensure everything runs smoothly.
Enabling telemetry does introduce some overhead (extra data processing), so you might not keep it on 100% of the time for personal use. However, it’s fantastic for debugging sessions or for intermittent health checks. One approach is to enable it on a CI server or in your team’s shared environment to collect stats, while leaving it off locally unless needed. Remember, you can always toggle it on the fly: update settings and use /memory refresh if needed to reload, or restart Gemini CLI with --telemetry flag. Also, all telemetry is under your control - it respects your environment variables for endpoint and credentials, so data goes only where you intend it to. This feature turns Gemini CLI from a black box into an observatory, shining light on how the AI agent interacts with your world, so you can continuously improve that interaction.
Pro Tip: If you just want a quick view of your current session’s stats (without full telemetry), use the /stats command. It will output metrics like token usage and session length right in the CLI. This is a lightweight way to see immediate numbers. But for long-term or multi-session analysis, telemetry is the way to go. And if you’re sending telemetry to a cloud project, consider setting up dashboards or alerts (e.g., alert if error rate spikes or token usage hits a threshold) - this can proactively catch issues in how Gemini CLI is being used in your team.
Tip 27: Keep an Eye on the Roadmap (Background Agents & More)
Quick use-case: Stay informed about upcoming Gemini CLI features - by following the public Gemini CLI roadmap, you’ll know about major planned enhancements (like background agents for long-running tasks) before they arrive, allowing you to plan and give feedback.
Gemini CLI is evolving rapidly, with new releases coming out frequently, so it’s wise to track what’s on the horizon. Google maintains a public roadmap for Gemini CLI on GitHub, detailing the key focus areas and features targeted for the near future. This is essentially a living document (and set of issues) where you can see what the developers are working on and what’s in the pipeline.
For instance, one exciting item on the roadmap is support for background agents - the ability to spawn autonomous agents that run in the background to handle tasks continuously or asynchronously. According to the roadmap discussion, these background agents would let you delegate long-running processes to Gemini CLI without tying up your interactive session. You could, say, start a background agent that monitors your project for certain events or periodically executes tasks, either on your local machine or even by deploying to a service like Cloud Run. This feature aims to “enable long-running, autonomous tasks and proactive assistance” right from the CLI, essentially extending Gemini CLI’s usefulness beyond just on-demand queries.
By keeping tabs on the roadmap, you’ll also learn about other planned features. These could include new tool integrations, support for additional Gemini model versions, UI/UX improvements, and more. The roadmap is usually organized by “areas” (for example, Extensibility, Model, Background, etc.) and often tagged with milestones (like a target quarter for delivery]. It’s not a guarantee of when something will land, but it gives a good idea of the team’s priorities. Since the project is open-source, you can even dive into the linked GitHub issues for each roadmap item to see design proposals and progress. For developers who rely on Gemini CLI, this transparency means you can anticipate changes - maybe an API is adding a feature you need, or a breaking change might be coming that you want to prepare for.
Following the roadmap can be as simple as bookmarking the GitHub project board or issue labeled “Roadmap” and checking periodically. Some major updates (like the introduction of Extensions or the IDE integration) were hinted at in the roadmap before they were officially announced, so you get a sneak peek. Additionally, the Gemini CLI team often encourages community feedback on those future features. If you have ideas or use cases for something like background agents, you can usually comment on the issue or discussion thread to influence its development.
Pro Tip: Since Gemini CLI is open source (Apache 2.0 licensed), you can do more than just watch the roadmap - you can participate! The maintainers welcome contributions, especially for items aligned with the roadmap. If there’s a feature you really care about, consider contributing code or testing once it’s in preview. At the very least, you can open a feature request if something you need isn’t on the roadmap yet. The roadmap page itself provides guidance on how to propose changes. Engaging with the project not only keeps you in the loop but also lets you shape the tool that you use. After all, Gemini CLI is built with community involvement in mind, and many recent features (like certain extensions and tools) started as community suggestions.
Tip 28: Extend Gemini CLI with Extensions
Quick use-case: Add new capabilities to Gemini CLI by installing plug-and-play extensions - for example, integrate with your favorite database or cloud service - expanding the AI’s toolset without any heavy lifting on your part. It’s like installing apps for your CLI to teach it new tricks.
Extensions are a game-changer introduced in late 2025: they allow you to customize and expand Gemini CLI’s functionality in a modular way. An extension is essentially a bundle of configurations (and optionally code) that connects Gemini CLI to an external tool or service. One of my favorite examples was the Nano Banana extension, as highlighted by Richard Seroter:
Fire up the Gemini CLI and install the nano-banana extension. I just did. Generate or edit images, create icons, even produce technical diagrams or mockups.
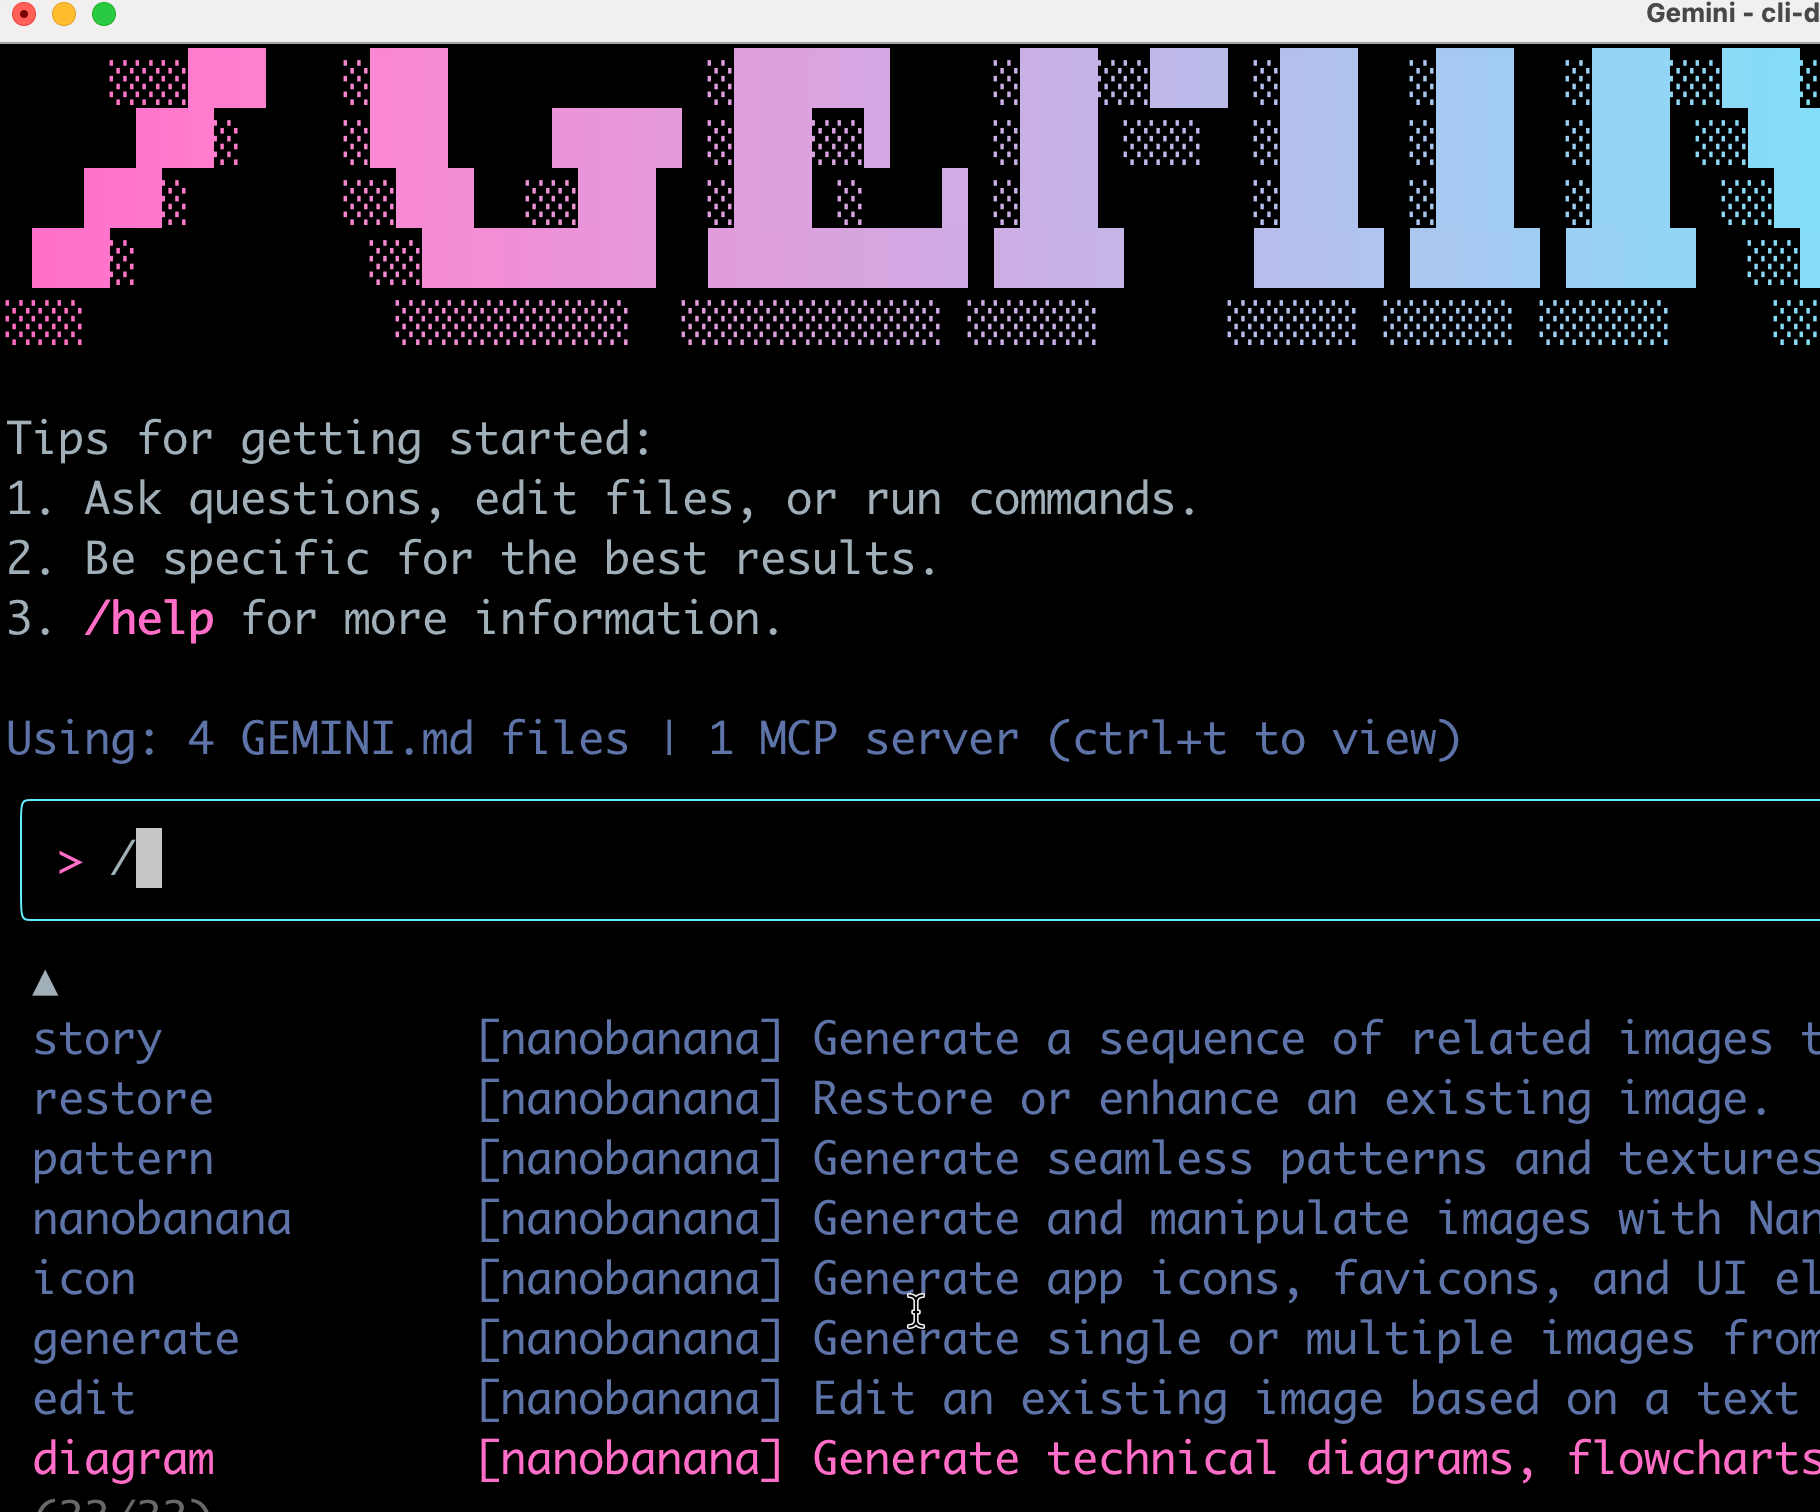
Google also released a suite of extensions for Google Cloud - there’s one that helps deploy apps to Cloud Run, one for managing BigQuery, one for analyzing application security, and more. Partners and community developers have built extensions for all sorts of things: Dynatrace (monitoring), Elastic (search analytics), Figma (design assets), Shopify, Snyk (security scans), Stripe (payments), and the list is growing. By installing an appropriate extension, you instantly grant Gemini CLI the ability to use new domain-specific tools. The beauty is that these extensions come with a pre-defined “playbook” that teaches the AI how to use the new tools effectively. That means once installed, you can ask Gemini CLI to perform tasks with those services and it will know the proper APIs or commands to invoke, as if it had that knowledge built-in.
Using extensions is very straightforward. The CLI has a command to manage them: gemini extensions install <URL>. Typically, you provide the URL of the extension’s GitHub repo or a local path, and the CLI will fetch and install it. For example, to install an official extension, you might run: gemini extensions install https://github.com/google-gemini/gemini-cli-extension-cloud-run. Within seconds, the extension is added to your environment (stored under ~/.gemini/extensions/ or your project’s .gemini/extensions/ folder). You can then see it by running /extensions in the CLI, which lists active extensions. From that point on, the AI has new tools at its disposal. If it’s a Cloud Run extension, you could say “Deploy my app to Cloud Run,” and Gemini CLI will actually be able to execute that (by calling the underlying gcloud commands through the extension’s tools). Essentially, extensions function as first-class expansions of Gemini CLI’s capabilities, but you opt-in to the ones you need.
There’s an open ecosystem around extensions. Google has an official Extensions page listing available extensions, and because the framework is open, anyone can create and share their own. If you have a particular internal API or workflow, you can build an extension for it so that Gemini CLI can assist with it. Writing an extension is easier than it sounds: you typically create a directory (say, my-extension/) with a file gemini-extension.json describing what tools or context to add. You might define new slash commands or specify remote APIs the AI can call. No need to modify Gemini CLI’s core - just drop in your extension. The CLI is designed to load these at runtime. Many extensions consist of adding custom MCP tools (Model Context Protocol servers or functions) that the AI can use. For example, an extension could add a /translate command by hooking into an external translation API; once installed, the AI knows how to use /translate. The key benefit is modularity: you install only the extensions you want, keeping the CLI lightweight, but you have the option to integrate virtually anything.
To manage extensions, besides the install command, you can update or remove them via similar CLI commands (gemini extensions update or just by removing the folder). It’s wise to occasionally check for updates on extensions you use, as they may receive improvements. The CLI might introduce an “extensions marketplace” style interface in the future, but for now, exploring the GitHub repositories and official catalog is the way to discover new ones. Some popular ones at launch include the GenAI Genkit extension (for building generative AI apps), and a variety of Google Cloud extensions that cover CI/CD, database admin, and more.
Pro Tip: If you’re building your own extension, start by looking at existing ones for examples. The official documentation provides an Extensions Guide with the schema and capabilities. A simple way to create a private extension is to use the @include functionality in GEMINI.md to inject scripts or context, but a full extension gives you more power (like packaging tools). Also, since extensions can include context files, you can use them to preload domain knowledge. Imagine an extension for your company’s internal API that includes a summary of the API and a tool to call it - the AI would then know how to handle requests related to that API. In short, extensions open up a new world where Gemini CLI can interface with anything. Keep an eye on the extensions marketplace for new additions, and don’t hesitate to share any useful extension you create with the community - you might just help thousands of other developers.
Additional Fun: Corgi Mode Easter Egg 🐕
Lastly, not a productivity tip but a delightful easter egg - try the command */corgi* in Gemini CLI. This toggles “corgi mode”, which makes a cute corgi animation run across your terminal! It doesn’t help you code any better, but it can certainly lighten the mood during a long coding session. You’ll see an ASCII art corgi dashing in the CLI interface. To turn it off, just run /corgi again.
This is a purely for-fun feature the team added (and yes, there’s even a tongue-in-cheek debate about spending dev time on corgi mode). It shows that the creators hide some whimsy in the tool. So when you need a quick break or a smile, give /corgi a try. 🐕🎉
(Rumor has it there might be other easter eggs or modes - who knows? Perhaps a “/partyparrot” or similar. The cheat sheet or help command lists /corgi, so it’s not a secret, just underused. Now you’re in on the joke!)
Conclusion
We’ve covered a comprehensive list of pro tips and features for Gemini CLI. From setting up persistent context with GEMINI.md, to writing custom commands and using advanced tools like MCP servers, to leveraging multi-modal inputs and automating workflows, there’s a lot this AI command-line assistant can do. As an external developer, you can integrate Gemini CLI into your daily routine - it’s like a powerful ally in your terminal that can handle tedious tasks, provide insights, and even troubleshoot your environment.
Gemini CLI is evolving rapidly (being open-source with community contributions), so new features and improvements are constantly on the horizon. By mastering the pro tips in this guide, you’ll be well-positioned to harness the full potential of this tool. It’s not just about using an AI model - it’s about integrating AI deeply into how you develop and manage software.
Happy coding with Gemini CLI, and have fun exploring just how far your “AI agent in the terminal” can take you.
You now have a Swiss-army knife of AI at your fingertips - use it wisely, and it will make you a more productive (and perhaps happier) developer!
I’m excited to share I’ve released a new AI-assisted engineering book with O’Reilly. There are a number of free tips on the book site in case interested.
