4 months ago I wrote the article"Serverless BERT with HuggingFace and AWS Lambda",which demonstrated how to use BERT in a serverless way with AWS Lambda and the Transformers Library from HuggingFace.
In this article, we are going to tackle all the drawbacks from my previous article like model load time, and dependencysize, and usage.
We are going to build the same "Serverless BERT powered Question-Answering API" as last time. But instead of usingcompressing techniques to fit our Python dependencies into our AWS Lambda function, we are using a tool calledefsync. I built efsync to automatically upload dependencies to an AWS EFSfilesystem and then mount them into our AWS Lambda function. This allows us to include our machine learning model intoour function without the need to load it from S3.
The Serverless Framework helps us develop and deploy AWS Lambda functions. It’s a CLIthat offers structure, automation, and best practices right out of the box.
AWS Lambda is a serverless computing service that lets yourun code without managing servers. It executes your code only when required and scales automatically, from a fewrequests per day to thousands per second.
Amazon Elastic File System (EFS)
Amazon EFS is a fully-managed service that makes it easy to set up, scale, andcost-optimize file storage in the Amazon Cloud. Since June 2020 you can mount AWS EFS to AWS Lambda functions
Efsync
Efsync is a CLI/SDK tool, which automatically syncs files and dependencies toAWS EFS. It enables you to install dependencies with the AWS Lambda runtime directly into your EFS filesystem and usethem in your AWS Lambda function.
Terraform is an Infrastructure as Code (IaC) tool for building cloud-native infrastructuresafely and efficiently. Terraform enables you to use HCL (HashiCorp Configuration Language) to describe yourcloud-native infrastructure.
The Transformers library provides state-of-the-art machine learningarchitectures like BERT, GPT-2, RoBERTa, XLM, DistilBert, XLNet, T5 for Natural Language Understanding (NLU) and NaturalLanguage Generation (NLG). It also provides thousands of pre-trained models in 100+ different languages.
Tutorial
Before we get started, make sure you have the Serverless Framework andTerraform configured and set up. Furthermore, you need access to an AWS Account to createan EFS Filesystem, API Gateway, and the AWS Lambda function.
In the tutorial, we are going to build a Question-Answering API with a pre-trained BERT model from Google.
We are going to send a context (small paragraph) and a question to the lambda function, which will respond with theanswer to the question.
What are we going to do:
create the required infrastructure using terraform.use efsync to upload our Python dependencies to AWS EFS.create a Python Lambda function with the Serverless Framework.add the BERTmodel to our function and create an inference pipeline.Configure the serverless.yaml, add EFS and set up an API Gateway for inference.deploy & test the function.
You will need a new IAM user called serverless-bert with AdministratorAccess and configured it with the AWS CLIusing aws configure --profile serverless-bert. This IAM user is used in the complete tutorial. If you don´t know howto do this check out this link.
Note: I don´t recommend create a IAM User for production usage with AdministratorAccess
Before we start, I want to say that we're not gonna go into detail for every step. If you want to understand more abouthow to use Deep Learning in AWS Lambda I suggest you check out my other articles:
Create the required infrastructure using terraform
At first, we define and create the required infrastructure using terraform. If you haven´t set it up you can check outthis tutorial.
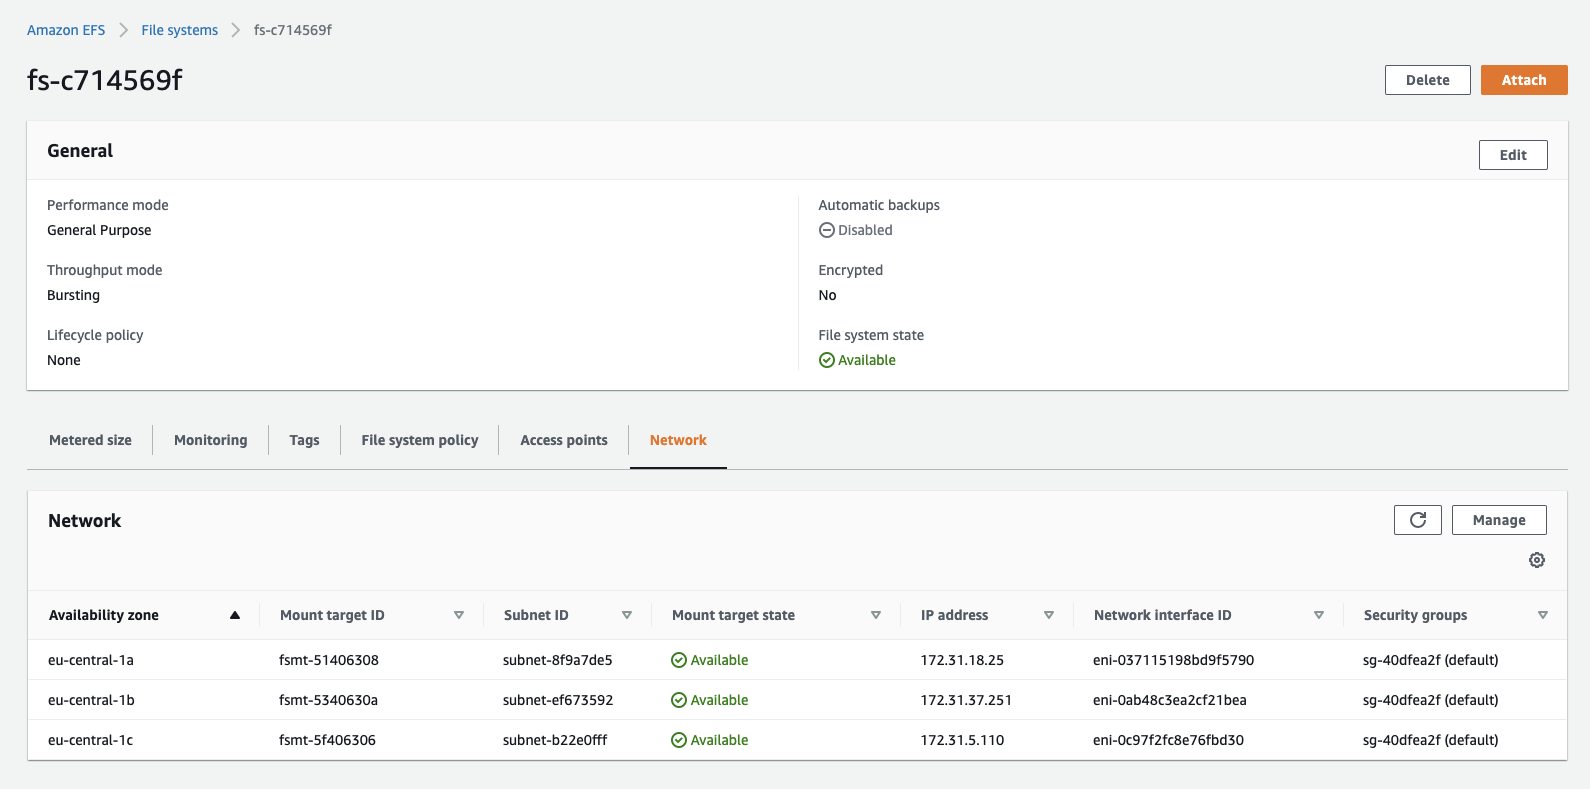
As infrastructure, we need an AWS EFS filesystem, an access point, and a mount target to be able to use it in our AWSLambda function. We could also create a VPC, but for the purpose of this tutorial, we are going to use the default VPCand his subnets.
Next, we create a directory serverless-bert/, which contains all code for this tutorial with a subfolder terraform/including our main.tf file.
Afterwards, we open the main.tf with our preferred IDE and add the terraform resources. I provided a basic templatefor all of them. If you want to customize them or add extra resources check out thedocumentation for all possibilities.
# providerprovider "aws" { region = "eu-central-1" shared_credentials_file = "~/.aws/credentials" profile = "serverless-bert"}# get all available availability zonesdata "aws_vpc" "default" { default = true}data "aws_subnet_ids" "subnets" { vpc_id = data.aws_vpc.default.id}# EFS File Systemresource "aws_efs_file_system" "efs" { creation_token = "serverless-bert"}# Access Pointresource "aws_efs_access_point" "access_point" { file_system_id = aws_efs_file_system.efs.id}# Mount Targetsresource "aws_efs_mount_target" "efs_targets" { for_each = data.aws_subnet_ids.subnets.ids subnet_id = each.value file_system_id = aws_efs_file_system.efs.id}## SSM Parameter for serverless#resource "aws_ssm_parameter" "efs_access_point" { name = "/efs/accessPoint/id" type = "String" value = aws_efs_access_point.access_point.id overwrite = true}
To change the name of EFS you can edit the value creation_token in the aws_efs_filesystem resource. Otherwise, thename of the EFS will be "serverless-bert". Additionally, we create an SSM parameter for the efs_access_point_id at theend to use it later in our serverless.yaml.
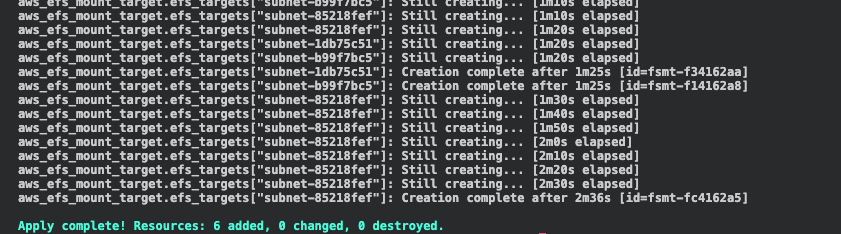
To use terraform we first run terraform init to initialize our project and provider (AWS). Be aware we have to be inthe terraform/ directory.
Afterwards, we check our IaC definitions with terraform plan
Use efsync to upload our Python dependencies to AWS EFS
The next step is to add and install our dependencies on our AWS EFS filesystem. Therefore we use a tool called efsync.I created efsync to install dependencies with the AWS Lambda runtime directlyinto your EFS filesystem and use them in your AWS Lambda function.
install efsync by running pip3 install efsync
After it is installed we create a requirements.txt in our root directory serverless-bert/ and add our dependenciesto it.
Efsync provides different configurations. This time we use the CLI with ayaml configuration. For that, we create an efsync.yaml file in our root directory.
#standard configurationefs_filesystem_id: <efs-filesystem-id> # aws efs filesystem idsubnet_Id: <subnet-id-of-mount-target> # subnet of which the efs is running inec2_key_name: efsync-asd913fjgq3 # required key name for starting the ec2 instanceclean_efs: all # Defines if the EFS should be cleaned up before. values: `'all'`,`'pip'`,`'file'` uploading# aws profile configurationaws_profile: serverless-bert # aws iam profile with required permission configured in .aws/credentialsaws_region: eu-central-1 # the aws region where the efs is running# pip dependencies configurationsefs_pip_dir: lib # pip directory on ec2python_version: 3.8 # python version used for installing pip dependencies -> should be used as lambda runtime afterwadsrequirements: requirements.txt # path + file to requirements.txt which holds the installable pip dependencies
Here we have to adjust the values of
Beware that if you changed the creation_token earlier you have to adjust it here.
You can choose one of your subnet_Ids for the efsync.yaml configuration. If you want to learn more about theconfiguration options, you can read more herehttps://www.philschmid.dehttps://www.philschmid.de/static/blog/new-serverless-bert-with-huggingface-aws-lambda/efsync.png efsync -cf efsync.yaml to install our Python dependencies on ourAWS EFS filesystem. This will take around 5-10 Minutes.
Create a Python Lambda function with the Serverless Framework
Third, we create our AWS Lambda function by using the Serverless CLI with the aws-python3 template.
serverless create --template aws-python3 --path function
This CLI command will create a new directory containing a handler.py, .gitignore, and serverless.yaml file. Thehandler.py contains some basic boilerplate code.
import jsondef hello(event, context): body = { "message": "Go Serverless v1.0! Your function executed successfully!", "input": event } response = { "statusCode": 200, "body": json.dumps(body) } return response
Add the BERTmodel to our function and create an inference pipeline
Since we are not including our Python dependencies into our AWS Lambda function, we have around 250MB of Storage to usefor our model files. For those who are not that familiar with AWS Lambda and its limitations, you can check out thislink.
If you want to use models, which are bigger than 250MB you could use efsync to upload them to EFS and then load themfrom there. Read more here.
To add our BERT model to our function we have to load it from themodel hub of HuggingFace. For this, I have created a python script. Before we canexecute this script we have to install the transformers library to our local environment and create a modeldirectory in our function/ directory.
mkdir model function/model
pip3 install torch==1.5.0 transformers==3.4.0
After we installed transformers we create get_model.py file in the function/ directory and include the scriptbelow.
from transformers import AutoModelForQuestionAnswering, AutoTokenizerdef get_model(model): """Loads model from Hugginface model hub""" try: model = AutoModelForQuestionAnswering.from_pretrained(model,use_cdn=True) model.save_pretrained('./model') except Exception as e: raise(e)def get_tokenizer(tokenizer): """Loads tokenizer from Hugginface model hub""" try: tokenizer = AutoTokenizer.from_pretrained(tokenizer) tokenizer.save_pretrained('./model') except Exception as e: raise(e)get_model('mrm8488/mobilebert-uncased-finetuned-squadv2')get_tokenizer('mrm8488/mobilebert-uncased-finetuned-squadv2')
To execute the script we run python3 get_model.py in the function/ directory.
Tip: add the model directory to gitignore.
The next step is to adjust our handler.py and include our serverless_pipeline().
At first, we add all the required imports and our EFS Filesystem to the PYTHONPATH so we can import our dependenciesfrom there. Therefore we use sys.path.append(os.environ['EFS_PIP_PATH']). We will define the EFS_PIP_PATH later inour serverless.yaml.
We create serverless_pipeline() function, which initializes our model and tokenizer and returns a predict function,we can use in our handler.
import sysimport os# adds EFS Filesystem to our PYTHONPATHsys.path.append(os.environ['EFS_PIP_PATH']) # nopep8 # noqaimport jsonimport torchfrom transformers import AutoModelForQuestionAnswering, AutoTokenizer, AutoConfigdef encode(tokenizer, question, context): """encodes the question and context with a given tokenizer""" encoded = tokenizer.encode_plus(question, context) return encoded["input_ids"], encoded["attention_mask"]def decode(tokenizer, token): """decodes the tokens to the answer with a given tokenizer""" answer_tokens = tokenizer.convert_ids_to_tokens( token, skip_special_tokens=True) return tokenizer.convert_tokens_to_string(answer_tokens)def serverless_pipeline(model_path='./model'): """Initializes the model and tokenzier and returns a predict function that ca be used as pipeline""" tokenizer = AutoTokenizer.from_pretrained(model_path) model = AutoModelForQuestionAnswering.from_pretrained(model_path) def predict(question, context): """predicts the answer on an given question and context. Uses encode and decode method from above""" input_ids, attention_mask = encode(tokenizer,question, context) start_scores, end_scores = model(torch.tensor( [input_ids]), attention_mask=torch.tensor([attention_mask])) ans_tokens = input_ids[torch.argmax( start_scores): torch.argmax(end_scores)+1] answer = decode(tokenizer,ans_tokens) return answer return predict# initializes the pipelinequestion_answering_pipeline = serverless_pipeline()def handler(event, context): try: # loads the incoming event into a dictonary body = json.loads(event['body']) # uses the pipeline to predict the answer answer = question_answering_pipeline(question=body['question'], context=body['context']) return { "statusCode": 200, "headers": { 'Content-Type': 'application/json', 'Access-Control-Allow-Origin': '*', "Access-Control-Allow-Credentials": True }, "body": json.dumps({'answer': answer}) } except Exception as e: print(repr(e)) return { "statusCode": 500, "headers": { 'Content-Type': 'application/json', 'Access-Control-Allow-Origin': '*', "Access-Control-Allow-Credentials": True }, "body": json.dumps({"error": repr(e)}) }
Configure the serverless.yaml, add EFS, and set up an API Gateway for inference.
I provide the complete serverless.yamlfor this example, but we go through all the details we need for ourEFS-filesystem and leave out all standard configurations. If you want to learn more about the serverless.yaml, Isuggest you check outScaling Machine Learning from ZERO to HERO. Inthis article, I went through each configuration and explain the usage of them.
We need to install the serverless-pseudo-parameters plugin with the following command.
npm install serverless-pseudo-parameters
We use the serverless-pseudo-parameters plugin to get our AWS::AccountID referenced in the serverless.yaml. Allcustom needed variables are referenced under custom or in our functions section.
custom:
efsAccessPoint should be the value of your EFS access point. Here we use our SSM parameter created earlier by ourterraform templates.LocalMountPath is the path under which EFS is mounted in the AWS Lambda function.efs_pip_path is the path under which we installed our Python dependencies using efsync.
functions
securityGroupIds can be any security group in the AWS account. We use the default security group id. This oneshould look like this sg-1018g448.
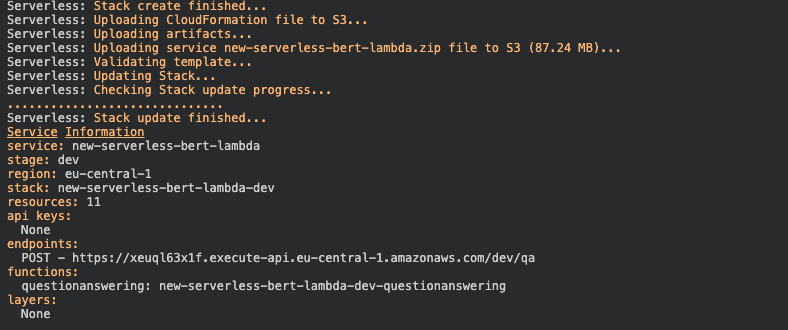
In order to deploy the function, we run serverless deploy --aws-profile serverless-bert.
After this process is done we should see something like this.
To test our Lambda function we can use Insomnia, Postman, or any other REST client. Just add a JSON with a context anda question to the body of your request. Let´s try it with our example from the colab notebook.
{ "context": "We introduce a new language representation model called BERT, which stands for idirectional Encoder Representations from Transformers. Unlike recent language epresentation models (Peters et al., 2018a; Radford et al., 2018), BERT is designed to pretrain deep bidirectional representations from unlabeled text by jointly conditioning on both left and right context in all layers. As a result, the pre-trained BERT model can be finetuned with just one additional output layer to create state-of-the-art models for a wide range of tasks, such as question answering and language inference, without substantial taskspecific architecture modifications. BERT is conceptually simple and empirically powerful. It obtains new state-of-the-art results on eleven natural language processing tasks, including pushing the GLUE score to 80.5% (7.7% point absolute improvement), MultiNLI accuracy to 86.7% (4.6% absolute improvement), SQuAD v1.1 question answering Test F1 to 93.2 (1.5 point absolute improvement) and SQuAD v2.0 Test F1 to 83.1 (5.1 point absolute improvement).", "question": "What is BERTs best score on Squadv2 ?"
Our serverless_pipeline() answered our question correctly with 83.1. Also, you can see the complete first requesttook 2900ms or 29s. 15 seconds of this used to initialize the model in our function.
The second request took only 390ms.
The best thing is, our BERT model automatically scales up if there are several incoming requests! It scales up tothousands of parallel requests without any worries.
Conclusion
We have successfully implemented a Serverless Question-Answering API. For Implementation, we used both IaC tools and"State of the Art" NLP models in a serverless fashion. We reduced the complexity from a developer's perspective butincluded a lot of DevOps/MLOps steps. I think it is necessary to include DevOps/MLOps, which handles your deployment andprovisioning if you want to run scalable serverless machine learning in production.