
In this blog, you will learn how to fine-tune XLM-RoBERTa for multi-lingual multi-class text-classification using a Habana Gaudi-based DL1 instance on AWS to take advantage of the cost performance benefits of Gaudi. We will use the Hugging Faces Transformers, Optimum Habana and Datasets library to fine-tune a pre-trained transformer for multi-class text classification. In particular, we will fine-tune XLM-RoBERTa-large using the Amazon Science Massive dataset. Before we get started, we need to set up the deep learning environment.
You will learn how to:
- Setup Habana Gaudi instanceLoad and process the datasetCreate a
GaudiTrainer and an run single HPU fine-tuningRun distributed data parallel training with GaudiTrainerCost performance benefits of Habana Gaudi on AWSRequirements
Before we can start make sure you have met the following requirements
1. Setup Habana Gaudi instance
In this example are we going to use Habana Gaudi on AWS using the DL1 instance. We already have created a blog post in the past on how to Setup Deep Learning environment for Hugging Face Transformers with Habana Gaudi on AWS. If you haven't have read this blog post, please read it first and go through the steps on how to setup the environment.Or if you feel comfortable you can use the start_instance.sh in the root of the repository to create your DL1 instance and the continue at step 4. Use Jupyter Notebook/Lab via ssh in the Setup blog post.
- run habana docker container an mount current directory
docker run -ti --runtime=habana -e HABANA_VISIBLE_DEVICES=all -e OMPI_MCA_btl_vader_single_copy_mechanism=none --cap-add=sys_nice --net=host --ipc=host -v $(pwd):/home/ubuntu/dev --workdir=/home/ubuntu/dev vault.habana.ai/gaudi-docker/1.5.0/ubuntu20.04/habanalabs/pytorch-installer-1.11.0:latest- install juptyer
- clone repository
git clone https://github.com/philschmid/deep-learning-habana-huggingface.gitcd fine-tuning- run jupyter notebook
jupyter notebook --allow-root# http://localhost:8888/?token=f8d00db29a6adc03023413b7f234d110fe0d24972d7ae65e- continue here
NOTE: The following steps assume that the code/cells are running on a gaudi instance with access to HPUs
As first lets make sure we have access to the HPUs.
import habana_frameworks.torch.core as htcore print(f"device available:{htcore.is_available()}")print(f"device_count:{htcore.get_device_count()}")next lets install our Hugging Face dependencies and git-lfs.
!pip install transformers datasets tensorboard matplotlib pandas sklearn!pip install git+https://github.com/huggingface/optimum-habana.git # workaround until release of optimum-habana# we will use git-lfs to upload models and artifacts to the hub.#! sudo apt-get install git-lfs!apt-get install git-lfsto finish our setup lets log into the Hugging Face Hub to push our model artifacts, logs and metrics during training and afterwards to the hub.
To be able to push our model to the Hub, you need to register on the Hugging Face.
We will use the notebook_login util from the huggingface_hub package to log into our account. You can get your token in the settings at Access Tokens
from huggingface_hub import notebook_login notebook_login() 2. Load and process the dataset
As Dataset we will use the AmazonScience/massive a multilingual intent(text)-classification dataset. The dataset contains over 1M utterances across 51 languages with annotations for the Natural Language Understanding tasks of intent prediction and slot annotation.
We are going to use the:
- English - United States (en-US)German - Germany (de-DE)French - France (fr-FR)Italian - Italy (it-IT)Portuguese - Portugal (pt-PT)Spanish - Spain (es-ES)Dutch - Netherlands (nl-NL)
splits. The dataset will have ~80 000 datapoints for training and ~14 000 for evaluation equally split across the different languages.
The Model which we will fine-tune is xlm-roberta-large a multilingual RoBERTa model. It was pre-trained on 2.5TB of filtered CommonCrawl data containing 100 languages.
model_id = "xlm-roberta-large"gaudi_config_id= "Habana/roberta-large" # more here: https://huggingface.co/Habanadataset_id = "AmazonScience/massive"dataset_configs=["en-US","de-DE","fr-FR","it-IT","pt-PT","es-ES","nl-NL"] seed=33repository_id = "habana-xlm-r-large-amazon-massive"You can change these configuration to your needs, e.g. the model_id to another BERT-like model for a different language, e.g. BERT-Large.
NOTE: Not all 100+ transformers architectures are currently support by optimum-habana you can find a list of supported archtiectures in the validated models section
We use the datasets library to download and preprocess our dataset. As a frist we will load a 7 different configurations and remove the unnecessary features/columns and the concatenate them into a single dataset.
from datasets import load_dataset, concatenate_datasets, DatasetDict # the columns we want to keep in the datasetkeep_columns = ["utt", "scenario"] # process individuell datasetsproc_lan_dataset_list=[]for lang in dataset_configs: # load dataset for language lang_ds = load_dataset(dataset_id, lang) # only keep the 'utt' & 'scenario column lang_ds = lang_ds.remove_columns([col for col in lang_ds["train"].column_names if col not in keep_columns]) # rename the columns to match transformers schema lang_ds = lang_ds.rename_column("utt", "text") lang_ds = lang_ds.rename_column("scenario", "label") proc_lan_dataset_list.append(lang_ds) # concat single splits into onetrain_dataset = concatenate_datasets([ds["train"] for ds in proc_lan_dataset_list])eval_dataset = concatenate_datasets([ds["validation"] for ds in proc_lan_dataset_list])# create datset dict for easier processingdataset = DatasetDict(dict(train=train_dataset,validation=eval_dataset))print(dataset)Before we prepare the dataset for training. Lets take a quick look at the class distribution of the dataset.
import pandas as pd df = dataset["train"].to_pandas() df.hist()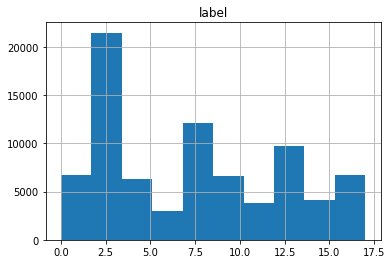
To train our model we need to convert our "Natural Language" to token IDs. This is done by a 🤗 Transformers Tokenizer which will tokenize the inputs (including converting the tokens to their corresponding IDs in the pretrained vocabulary). If you are not sure what this means check out chapter 6 of the Hugging Face Course.
from transformers import AutoTokenizer tokenizer = AutoTokenizer.from_pretrained(model_id)Additionally we add the truncation=True and padding=max_length to align the length and truncate texts that are bigger than the maximum size allowed by the model.
def process(examples): tokenized_inputs = tokenizer( examples["text"], padding="max_length", truncation=True ) return tokenized_inputs tokenized_datasets = dataset.map(process, batched=True)tokenized_datasets["train"].featuresNow that our dataset is processed, we can download the pre-trained model and fine-tune it.
3. Create a GaudiTrainer and an run single HPU fine-tuning
Normally you would use the Trainer and TrainingArguments to fine-tune a pytorch-based transformer model. Since we are using the optimum-habana library, we can use the GaudiTrainer and GaudiTrainingArguments instead. The GaudiTrainer is a wrapper around the Trainer and TrainingArguments that allows you to fine-tune a transformer model on a gaudi instance, with a similar API to the Trainer and TrainingArguments classes. Below you see how easy it is to migrate from the Trainer and TrainingArguments classes to the GaudiTrainer and GaudiTrainingArguments classes.
-from transformers import Trainer, TrainingArguments+from optimum.habana import GaudiTrainer, GaudiTrainingArguments # define the training arguments-training_args = TrainingArguments(+training_args = GaudiTrainingArguments(+ use_habana=True,+ use_lazy_mode=True,+ gaudi_config_name=path_to_gaudi_config, ...) # Initialize our Trainer-trainer = Trainer(+trainer = GaudiTrainer( model=model, args=training_args, train_dataset=train_dataset ... # other arguments)Before we create our GaudiTrainer we first need to define a compute_metrics function to evaluate our model on the test set. This function will be used during the training process to compute the accuracy & f1 of our model.
from datasets import load_metricimport numpy as np # define metrics and metrics functionf1_metric = load_metric("f1")accuracy_metric = load_metric( "accuracy") def compute_metrics(eval_pred): predictions, labels = eval_pred predictions = np.argmax(predictions, axis=1) acc = accuracy_metric.compute(predictions=predictions, references=labels) f1 = f1_metric.compute(predictions=predictions, references=labels, average="micro") return { "accuracy": acc["accuracy"], "f1": f1["f1"], }Hyperparameter Definition, Model Loading
from transformers import AutoModelForSequenceClassification,DataCollatorWithPaddingfrom optimum.habana import GaudiTrainer, GaudiTrainingArgumentsfrom huggingface_hub import HfFolder # create label2id, id2label dicts for nice outputs for the modellabels = tokenized_datasets["train"].features["label"].namesnum_labels = len(labels)label2id, id2label = dict(), dict()for i, label in enumerate(labels): label2id[label] = str(i) id2label[str(i)] = label # define training argstraining_args = GaudiTrainingArguments( output_dir=repository_id, use_habana=True, use_lazy_mode=True, gaudi_config_name=gaudi_config_id, num_train_epochs=5, per_device_train_batch_size=8, per_device_eval_batch_size=8,) # define modelmodel = AutoModelForSequenceClassification.from_pretrained( model_id, num_labels=num_labels, id2label=id2label, label2id=label2id,) # create Trainertrainer = GaudiTrainer( model=model, args=training_args, train_dataset=tokenized_datasets["train"], eval_dataset=tokenized_datasets["validation"], tokenizer=tokenizer, compute_metrics=compute_metrics,)# start training on 1x HPUtrainer.train()# evaluate modeltrainer.evaluate(eval_dataset=tokenized_datasets["validation"])4. Run distributed data parallel training with GaudiTrainer
running the training only on a single HPU-core takes way to long (5h). Luckily with DL1 instance we have 8 available HPU-cores meaning we can leverage distributed training.To run our training as distributed training we need to create a training script, which can be used with multiprocessing to run on all HPUs.We have created a scripts/train.py which contains all the previous steps of the example so far. To executed our distributed training we use the DistributedRunner runner from optimum-habana alternatively you could check-out the gaudi_spawn.py in the optimum-habana repository.
from optimum.habana.distributed import DistributedRunnerfrom optimum.utils import logging world_size=8 # Number of HPUs to use (1 or 8) # define distributed runnerdistributed_runner = DistributedRunner( command_list=["scripts/train.py --use_habana True"], world_size=world_size, use_mpi=True, multi_hls=False,) # start jobret_code = distributed_runner.run()5. Cost performance benefits of Habana Gaudi on AWS
The distributed training on all 8x HPUs took in total 52 minutes. The dl1.24xlarge instance on AWS costs $13.11 per hour leading to only $11,55 for our training.To provide a cost-performance comparison we run the same training on the AWS p3.8xlarge instance, which costs roughly the same with $12.24, but only has 4x accelerators (4x NVIDIA V100). The training on the p3.8xlarge instance took in total about 439 minutes and cost $89.72.Meaning the Habana Gaudi instance is 8.4x faster and 7.7x cheaper than the price equivalent NVIDIA powered instance.Below is a detailed table of results. Additional both models are available on the Hugging Face Hub at philschmid/habana-xlm-r-large-amazon-massive and philschmid/gpu-xlm-roberta-large-amazon-massive
| accelerator | training time (in minutes) | total cost | total batch size | aws instance type | instance price per hour |
|---|---|---|---|---|---|
| Habana Gaudi (HPU) | 52.6 | $11.55 | 64 | dl1.24xlarge | $13.11 |
| NVIDIA V100 (GPU) | 439.8 | $89.72 | 4 | p3.8xlarge | $12.24 |
