
The DirectX Diagnostic tool on Windows 11 shows extensive information about your computer’s software and hardware. You can use it to check the operating system, system model, BIOS version, Processor, Memory, and Graphics card details, among other things.
If you are a Windows 11 user, checking and installing the latest version of DirectX is essential. Updating to the latest version can help resolve various issues when running graphics-intensive apps & games. However, before updating DirectX, you should check which version is currently installed.
Also read: Windows 11 Free Download Full Version
1. Check the DirectX version on Windows 11 via RUN
The easiest way to check the DirectX version is to utilize the RUN dialog box. Here’s what you need to do.
1. Click on the Windows 11 Search and type in RUN. Open the RUN dialog box from the list of options.
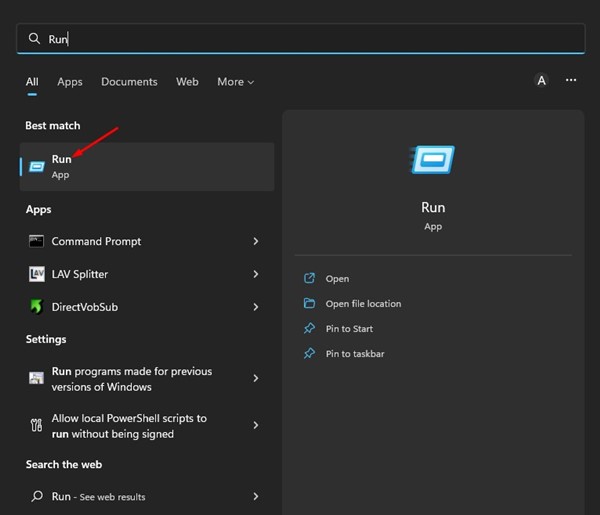
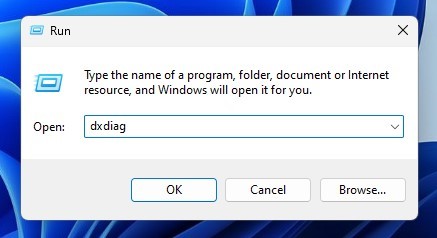
2. Type dxdiag and press Enter.
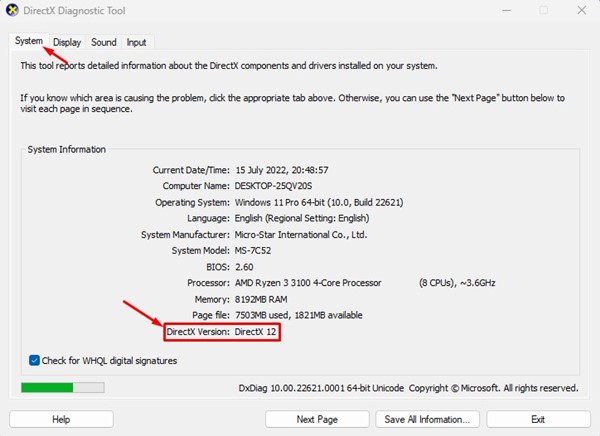
3. This will open the DirectX Diagnostic Tool on Windows 11. Switch to the System tab, and the DirectX version will be at the bottom of the window.
2. Check DirectX Version via Windows 11 Search
You can also utilize the Windows 11 search to check the DirectX version. Open the Windows 11 Search.
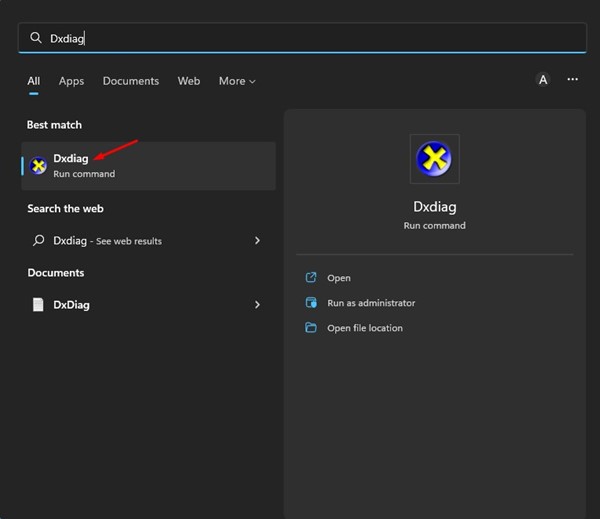
On the Windows search, type dxdiag. Now open the Dxdiag (Run command) from the list. This will open the DirectX Diagnostic tool on your Windows 11 computer.
Switch to the System tab and check the DirectX version at the bottom.
3. Check the DirectX version via CMD/PowerShell
Pro users can take the help of the CMD or PowerShell utility to check the DirectX version. Here’s what to do.
1. Click on the Windows 11 Search and type in Command Prompt or PowerShell. Next, open the matching utility from the search results.
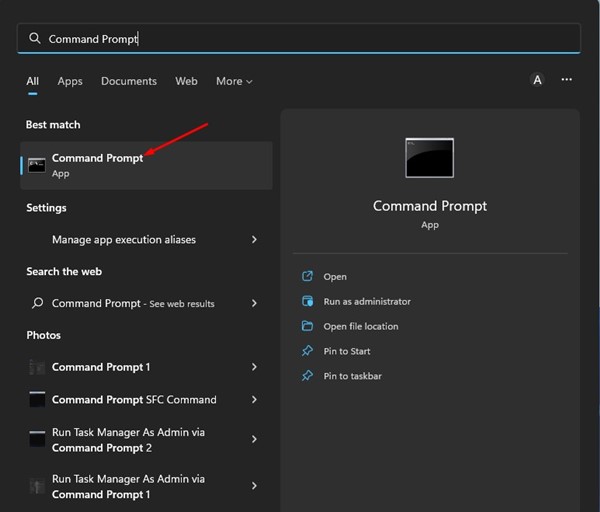
2. On the CMD/Powershell, enter dxdiag and press Enter.
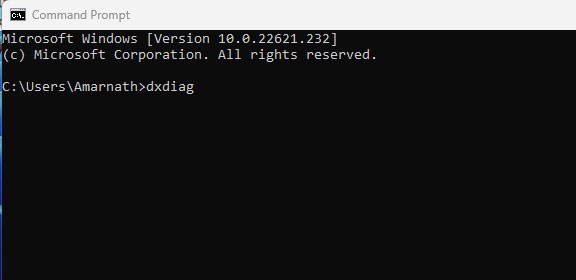
3. This will open the DirectX diagnostic tool. Switch to the System tab and check the DirectX version at the bottom.
How to Update DirectX on Windows 11?
Now that you know how to check the DirectX version on Windows 11, it’s time to know how to update it to the latest version.
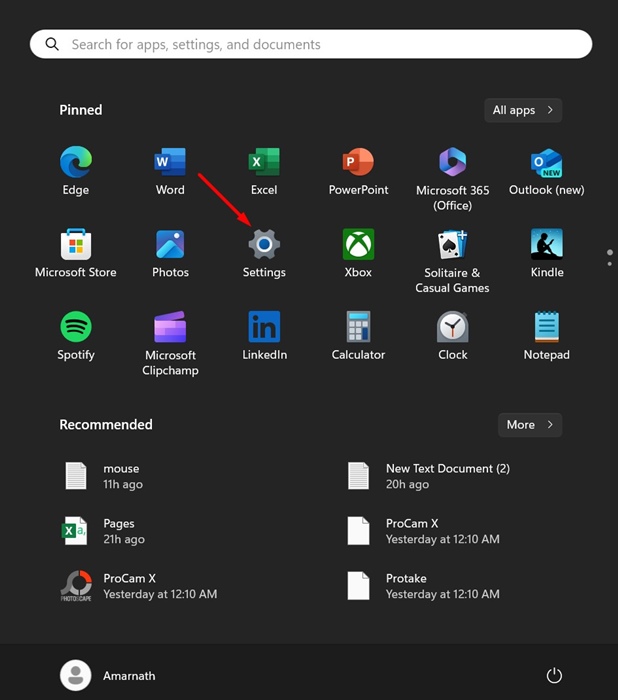
1. Launch the Settings app.
2. Tap on Windows Update.
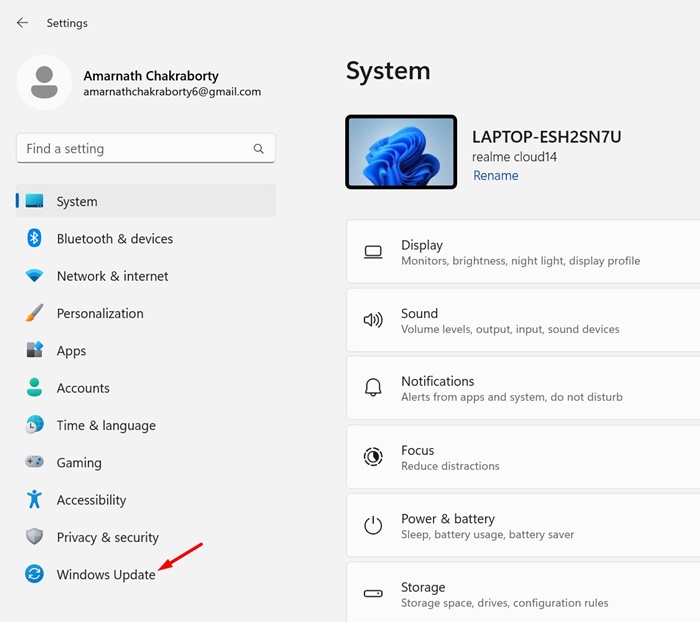
3. Click the Check for Updates.
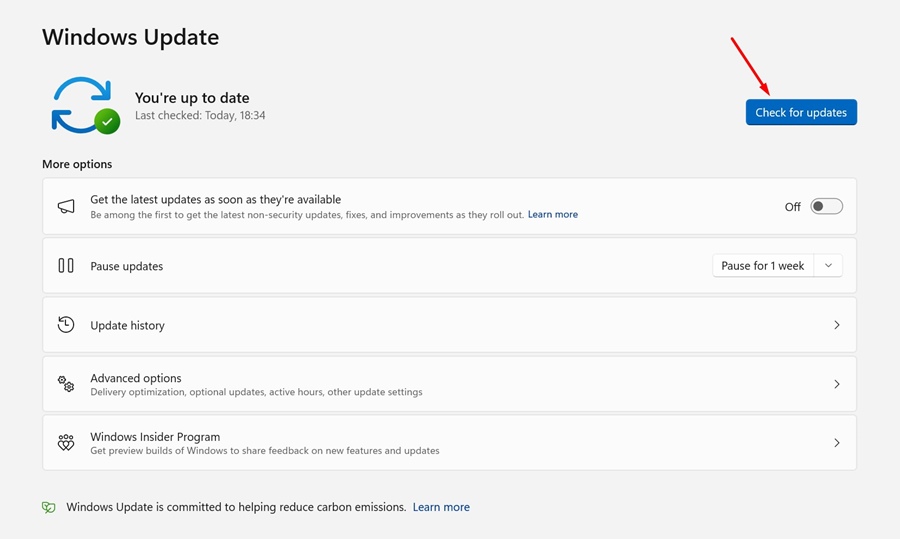
This will download & install all pending Windows updates and update the DirectX version.
These are some of the easiest ways to check the DirectX version in Windows 11. Every method relies on the DirectX diagnostic tool. If you know any other way to check it, let us know in the comments.
The post How to Check DirectX Version on Windows 11 appeared first on TechViral.
